It’s great to see more people travelling with their bikes around Thailand and Thai airlines are becoming bike friendly. What’s not great is the way people are packing their bikes and the experiences people have had with the airlines when it comes to bringing their bikes on-board.
I had a bad experience with an airline many years ago when I brought my bike to Thailand. Before I left Dublin I called the airline to check the restrictions on transporting bikes. The staff was unclear regarding restrictions and were generally not helpful. They encouraged me to check their website. After navigating confused web pages I finally got the information I needed.
I made it to Thailand and had a great trip, but on the return journey, bike boxed in exactly the same way as the outbound journey, I arrived at check-in. This time, the lovely looking check-in attendant was confused as to what a bike was. When she figured it out she proceeded to charge me around 7,000 baht. This lovely looking check-in attendant turned out to be… well, not so lovely. Luckily, I had a copy of the airlines’ bike restrictions and showed it to the manager. After further confusion, I finally got the bike checked in.
Here are some tips about how to avoid confusion at the airport:
1. Check the rules and restrictions online of each airline you are utilizing on your trip.
2. Make copies and bring them with you to the airport.
3. Make sure your measurements and weight are correct.
4. Be sure your box/bag has no bulges and is clean.
5. Be aware of customs changes and ask the airlines for advice.
HOW TO BOX YOUR BIKE SO IT DOES NOT TURN INTO A UNICYCLE
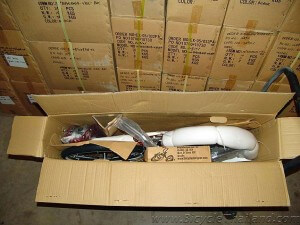
Local bike shops go through loads of bike boxes and packing materials every day. It should be very easy to get a bike box in the dimensions you require, with a load of packing materials. Here is a step to step guide to the materials you need and the way to pack your bike securely.
Materials list from the bike shop:
- Bike box
- Cardboard, pipe insulation, bubble wrap etc.
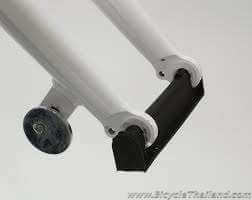
- Front Fork protector
- Rear axle protectors X 2
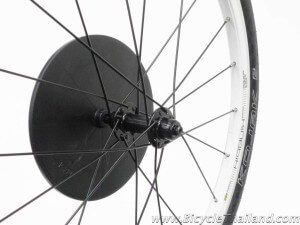
- Front axle protector X 2 (If you have discs – ask for 1 disc protector)
- Seat tube protector
- Small accessories box for pedals, skewers etc.
Materials you will have to buy:
- Zip Ties
- Wide packing tape.
Tools:
- Allen Keys for your bike – 4,5 and 6 standard
- 15mm Pedal Spanner
- Rubber hammer
STEPS:
1. Put bike on a bike stand or secure it.
2. DEFLATE TIRES – but leave them soft, NOT empty.
3. REMOVE PEDALS – Right pedals turn counter-clockwise and left, clockwise. This will be a nightmare if your pedals have not been greased. Extend leverage if necessary. Place the pedal in a small accessory box, ready to put into big box.
4. BRAKES – Disconnect front brake cable from caliper. If you’re using discs, remove the caliper so the caliper is hanging loose. Cover using cardboard etc.
5. REMOVE FRONT WHEEL – Make sure you don’t lose your quick release skewers, bolts, pedals etc. Keep them all together in a small box for packing into big box.
6. Press axle protectors into axles and insert fork protector into drop-outs. You may need to give it a tap with a hammer to make sure they go in. DON’T FORCE IT!
7. REMOVE SADDLE and cover with cardboard. Make sure to pack around the seat post. You don’t want a scratched frame. Insert seat tube protector into frame.
8. GEARS – While pedalling, push the rear derailleur to the first gear. This will loosen your gear cables allowing you to remove the cables from the gear cable frame holders. You can do the same with the front derailleur without pedalling.
9. Push on rear axle protectors.
10. REMOVE HANDLE BARS – These should now hang loose, allowing you to attach to frame later. Cover using cardboard etc.

12. Turn front fork 180 degrees to face backwards.
13. Turn the right crank so it points to the back of the frame. Zip tie to the frame through the pedal threads.
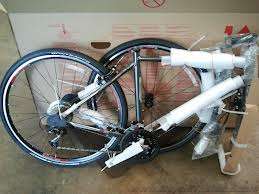
14. TRICKY PART- With the bike on the ground, the front wheel must fit between the left crank and on the right side of the frame. See picture below. Be careful not to force and damage spokes. Once done, Zip tie to frame and into place.
15. Zip tie handlebars to right side of frame, but make sure brake-levers and shifters don’t stick out.
16. Attach front disc caliper under frame, if necessary.
17. INSERT INTO BOX- if it does not fit first time, you may need to make adjustments. If necessary, you may need to remove stem if it’s too high. Just make sure it’s secure.
18. Once in, make sure it’s not bulking and all your accessories are in the box and secured.
19. Use tape to secure and seal the box.
20. Write on the box in big letters, “THIS WAY UP AND FRAGILE”.
JOB DONE! HAVE A SAFE TRIP!


a very good discription