I must be the unluckiest rider when it comes to punctures and repairs while on a trail. I’ve been stuck in the middle of nowhere with no tubes or spare wheels, but I always ride home. Trained as a ‘Cytech Bicycle Mechanic’, I’ve got out of some sticky situations using creative ideas. Below are some major issues a rider experiences, but they can be fixed without carrying the bike home.
BE PREPARED
Bring important tools/parts suited for your bike:
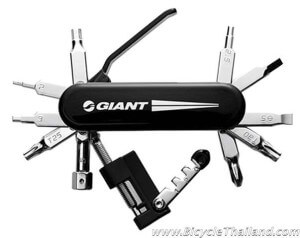
1. Multi tool – it includes: Allen wrenches (1.5, 2. 2.5, 3, 4, 5, 6, 8, 10mm depending on your bike), Torx T25, Chain Breaker, Tire levers, Screwdriver (Flat & Philips), Spoke tool
2. Knife or small blade
3. Pliers – Good for bending metal or sewing.
4. Pump
5. Spare tube
6. Zip ties – big and small – strong enough to secure anything. (Zip tie the tube under your seat to save space).
7. Duck tape- strong and sticky (wrap it around seat post to save space).
8. Puncture repair kit.
9. Dental floss – Strong and good for sewing or tying things together.
10. Energy bars, water bottle, rain coat, whistle and lighter.
A PUNCTURE – WHEN YOU HAVE NO MORE TUBES OR PATCHES
Time to be creative; otherwise you’re carrying your bike home.
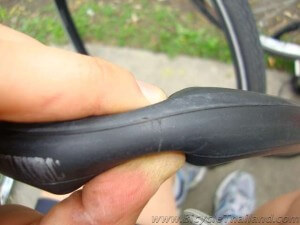
First, take the wheel and tire off to find the hole or rip. Depending on the size of the damage, you may be able to cover the hole to get you home.
WHO NEEDS BIKE PATCHES!
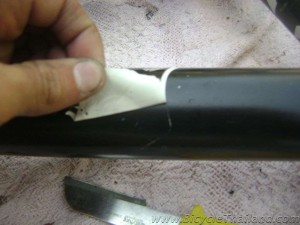
Step 1: Find an alternative patch – Peal a sticker off your bike, water bottle or helmet.
Step 2: Use this as your patch. Sand the hole, glue it and stick the patch on, apply pressure until dry and get yourself home. http://bicyclethailand.com/trail-repairs-part-1-punctures/
If you’re really stuck and have a large slice or ripped valve, you have 2 options: both aren’t comfortable, but they will get you home:
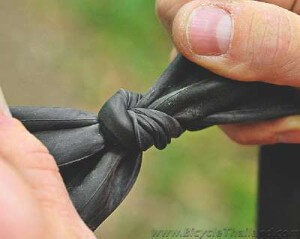
TIE THE KNOT–
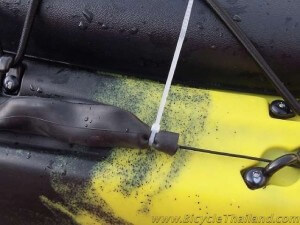
Step 1: Cut the tube at each end of the hole/slice. You can do this either with a blade or using a sharp chain ring on the bike.
Step 2: Tie a knot at both ends making sure it’s as tight as possible. Make sure you don’t leave too much slack that you can’t get the tube back on the wheel.
Step 3: Pump some air before you put the wheel back on to test for leakage. Be patient as this may take a few goes. You could use zip ties to help make the seal more secure.
Step 4: Stretch it over the wheel and pump to a low pressure, just enough to get you home and to not damage your wheel.
TUBELESS TIRE OR JUST TUBELESS!
This is your last resort! Proven to work by my friends and I in Ireland while it was pouring with freezing rain. This is not pretty, but it will work, given a little time and patience.
Make a tube
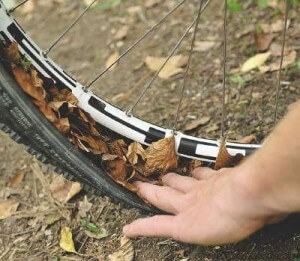
Step 1: Grab piles of grass, leaves or anything soft around you.
Step 2: Evenly pack the tire with as much as possible.
Step 3: Once you can’t pack any more, compress the tire with a short ride and continue the packing process.
You will have to do this many times before the bike can be ridden and you may need to repeat the process on the way home. Be careful not to damage your wheel by cycling on the rim. My friends and I made it home after riding 10 miles. Not comfortable, but it works.
BROKEN REAR DERAILLEUR, FRONT DERAILLEUR OR CHAIN
A broken derailleur is normally caused by a bent hanger forcing the derailleur into the spokes. If you are unable to bend it into place, then you have no option but to take it off and continue with single speed. Most likely your chain is bent and will need shortened.
Step 1: Use your chain breaker to push the chain link at the start of the bent chain. DO NOT take the pin completely out. Only push the pin far enough so you can clip the chain apart, keeping the pin attached to one side of the link.
Step 2: Take the chain off.
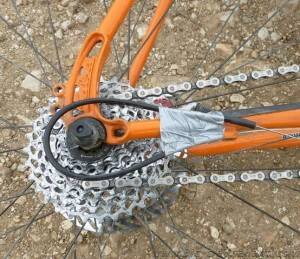
Step 3: If the derailleur is damaged – unscrew the gear cable and take the derailleur off. Secure the gear cable to the frame with a zip tie or duck tape.
Step 4: Chose a light, comfortable gear that is easy to ride (e.g.- middle chain ring to middle cassette ring).
Step 5: Measure the chain length by wrapping the chain around the chosen gear, using the pushed pin as the starting pin.
Step 6: Shorten the chain to the correct length.
Step 7: Hang the chain on the bottom bracket so it’s loose. Connect the chain. If the link is stiff, bend it back and forth until it is loose.
Step 8: Reattach the chain to the chain-rings and adjust to give it tension.
Remember: DON’T USE YOUR GEARS.
WOBBLY WHEEL
If you’ve badly bent your wheel, it will never be the same again. You will need a new rim and spokes, but the hub should be O.K. First you need to get home.
Step 1: Deflate the tube.
Step 2: Take the wheel and tire off.
Step 3: NOW THE FUN PART (Remember your rim is dead) – Get the rim as straight as possible by applying pressure. Be sure not to damage the rim walls or hub. Be creative. Stand on it or jump on it. Once you have it in riding condition, reattach.
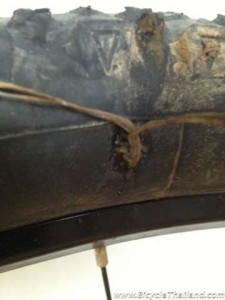
RIPPED TIRE SIDE WALL
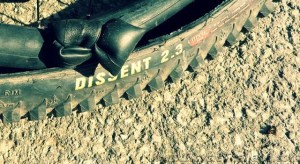
Normally caused by a sharp rock, resulting in your tube popping out. It’s unlikely you will be carrying a tire boot, so you will have to be creative.
If you have dental floss you could stitch the gap.
If not, you will have to patch it. A friend of mine once used an energy bar wrapper and some duck tape to hold it in place. I have also heard of money notes and race number plates being used. Remember – it’s just to get you home.
Step 1: Find a patch strong enough to hold in the tube.
Step 2: Use duck tape, glue etc to hold the patch in place.
Step 3: Refit the tube and pump it slowly to a low pressure.
Ride slowly and keep checking the repair.
Leave a Reply