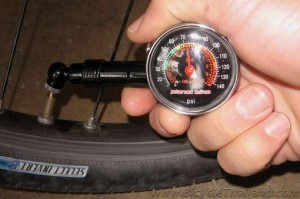
Mountain bike tire pressure is THE often-overlooked factor that could make a huge difference on your next off-road ride. It’s amazing how something as simple as air pressure can affect the performance of any mountain bike, whether it is a $5,000 full-suspension rig or a $300 dollar hardtail suited for beginners.
The skinny on your fatty MTB tires:
- Overinflated tires:
- Do not grip well in corners
- Give a harsher feel to your ride/suspension
- Cause uneven wear patterns on your tires that could lead to premature failure
- Underinflated tires:
- Will cause you to have handling/control problems
- Will damage the rims on your bicycle
- May cause your tire to separate from your rim while riding (Much less likely to happen if you’re using tubeless tires)
- Cause uneven wear patterns on your tires that could lead to premature failure
The factors to consider when selecting tire pressure are:
- Rider weight and experience level
- More experienced riders can use slightly lower tire pressures than the ones recommended on the chart. This is because more experienced riders are better at picking the smoothest lines of a trail.
- A less experienced rider may not pick the smoothest lines of a trail and inadvertently cause damage to the rims of their bicycle by striking more obstacles (rocks) along the trail.
- Trail conditions
- On trails that have sand or other loose material it is recommended to reduce the air pressure 1-3 psi from both tires.
- On trails that have fast-rolling dirt and or clay material it is recommended to increase the air pressure 1-3 psi to both tires.
- Tire size
- The front tire should be 2-4 psi lower than the rear tire.
This will increase the front tire grip on berms and off-camber sections of a trail.
- Never simply squeeze a tire to ascertain its pressure level. Invest in a good quality pump with a built-in gauge and/or a hand held bicycle tire pressure tool.
- Tubeless style tires have a more rigid sidewall and therefore can be ridden with less air pressure than clincher style tires. That is one of the main advantages of using tubeless tires.
Use this handy chart as a good starting point for mountain bike tire pressures
| Rider weight (lbs-kg) | Tubeless
26 x 2.0-2.2 |
Tubeless
26 x 2.2-2.4 |
Tubeless
26 x 2.4-2.6 |
Clincher
26 x 2.0-2.2 |
Clincher
26 x 2.2-2.4 |
| 100lbs-45kg | 27 psi | 24 psi | 21 psi | 32 psi | 29 psi |
| 110lbs-50kg | 28 psi | 25 psi | 22 psi | 33 psi | 30 psi |
| 120lbs-54kg | 29 psi | 26 psi | 23 psi | 34 psi | 31 psi |
| 130lbs-59kg | 30 psi | 27 psi | 24 psi | 35 psi | 32 psi |
| 140lbs-63kg | 31 psi | 28 psi | 25 psi | 36 psi | 33 psi |
| 150lbs-68kg | 32 psi | 29 psi | 26 psi | 37 psi | 34 psi |
| 160lbs-72kg | 33 psi | 30 psi | 27 psi | 38 psi | 35 psi |
| 170lbs-77kg | 34 psi | 31 psi | 28 psi | 39 psi | 36 psi |
| 180lbs-81kg | 35 psi | 32 psi | 29 psi | 40 psi | 37 psi |
| 190lbs-86kg | 36 psi | 33 psi | 30 psi | 41 psi | 38 psi |
| 200lbs-90kg | 37 psi | 34 psi | 31 psi | 42 psi | 39 psi |
| 210lbs-95kg | 38 psi | 35 psi | 32 psi | 43 psi | 40 psi |
| 220lbs-100kg | 39 psi | 36 psi | 33 psi | 44 psi | 41 psi |

I have no Idea about how can I say thanks to this team bicyclethailand. Cause, I have just started a cycle business. few people are asked me for about any info about a cycle, I’m very much benefited from this info. keep posting Another update,