Only the luckiest cyclist will go their entire cycle career without ever getting a puncture. The first puncture is something they live in fear of; will it happen during their morning commute? the middle of a race? or just mid Sunday ride? Having the knowledge of how to repair a puncture will mean you no longer live in fear of your next puncture and will be back on your way quickly and without a lot of bother. Following these ten easy steps will give you the knowledge to fix a puncture and be back on your bike in minutes.
Tools & parts required : Inner tube, tyre levers, pump, spanners (to remove wheels if required).
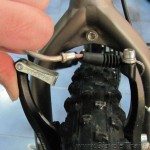
Step One: If your bike uses rim brakes, you will have to release the brakes.
To release the v-brake with one hand push the brake arms together whilst pulling on the noodle to release the cable.
If your bikes uses disc brakes, no action is required. Although it’s important not to pull the brake lever with the wheel removed.
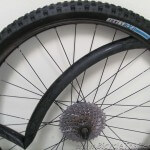
Remove the wheel by releasing the quick release lever or undoing wheel nuts.
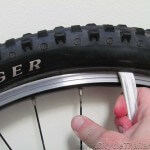
Step Two: Use a tyre lever to remove one side of the tyre from the rim. Use only tyre levers and not screwdrivers or keys as these may damage your tyre or rim.
Step Three: Remove the damaged tube by reaching into the tyre and pulling the tube out.
Do not leave the old tube on the trail. Take it home as you may be able to repair it or recycle it into something else.
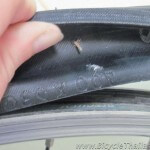
Step Four: Before you can put in your new tube it is essential to check the tyre for thorns or other sharp objects plus cuts and tears in the tyre. Not removing these objects could lead to a second immediate puncture! The best way to do this is to GENTLY run your fingers around the inside of the tyre whilst looking at the outside of the tyre for anything obvious. While you are doing this also look out for cuts in the tyre. Once you’re happy there is nothing that is going to puncture the new inner tube you can move on to the next stage.
Step Five: Prior to putting the new tube into the tyre, inflate the tube slightly so that it takes its shape. This will enable you to easily put the tyre back onto the rim, reducing the risk of pinching the tube between the tyre and the rim (again causing another puncture!).
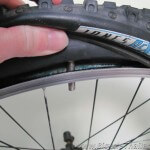
Step Six: Insert the valve into the hole in the rim. The easiest way to do this is to pull the tyre away from the rim so that the hole is visible. Push the valve in then pull the tyre back over the tube.
Step Seven: Now place the rest of the tube into the tyre. With the tube slightly inflated this should be fairly easy.
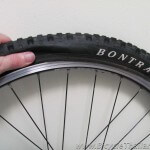
Step Eight: Putting the tyre back on the rim. This can be done using just your thumbs, but have a tyre lever to hand if the tyre gets very tight towards the end. I find it easier to use one thumb to push the tyre in place while using the other thumb to prevent the tyre from popping off again.
Try doing a small bit at a time rather than trying to push large chunks of tyre onto the rim. If the tyre begins to get very tight, try pushing the parts of the tyre already in place, further onto the rim. This will make it easier to finish the job.
Step Nine: Once you are happy that the tyre is in place, it is time to pump up the tyre. A good quality pump will make this a lot quicker and easier. Be sure to fit the pump correctly to the valve so as not to damage the valve or you will have to start the whole process again!
Step Ten: Refit the wheel on the bike making sure the quick release is done up correctly and the brakes are reconnected in the right way.
If you are refitting the rear wheel, it is a lot easier to do so by selecting the highest gear on the shifter. This will place the the chain on the smallest cog of the rear wheel.
It’s always a good idea to give the brake levers a quick pull before riding off, just to double check they are working correctly!
You now have the skills and knowledge to quickly and efficiently change your tube in any situation provided you have a spare inner tube with you! If you happen to find yourself without an inner tube it’s time to go back to the old school and patch that hole!
Repairing a punctured tube is an easy process and can save money on the the cost of new tubes. I prefer to use pre glued patches as they’re quick, clean and super fast. If you choose to use glue and patches my top tip is to apply the glue to the tube then massage the glue until it becomes tacky. It’s a common mistake to stick the patch onto wet glue and wonder why it doesn’t stick. If you’re unlucky enough to cut or tear the tyre to the point that the tube is going to pop out when inflated there are a few quick fixes you can do to temporally repair the tyre until you can get it replaced. Folding up a 100 baht note is one way although this may be expensive. I’ve seen many objects used but my favorite to date is a cardboard drinks carton cut to shape. Good luck and ride hard.
Leave a Reply