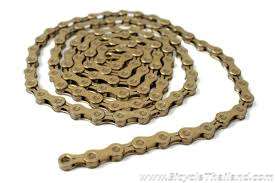
Your chain might be one of the most important parts on your bicycle (with the exception of bearings), and without its chain your bicycle quickly becomes nothing more than an expensive paperweight, capable only of gravity-aided propulsion. In addition to being one of the most important parts on your bicycle the chain also is one of the hardest working. Giving your bicycle’s chain proper care and attention will go a long way to ensuring you, and your bike, remain so happy together on your next ride. Here are five ways to keep your bicycle chain happy.
1. Clean it
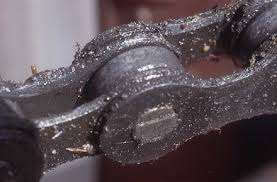
A clean chain shifts better and lasts longer. A dirty, greasy chain is slow to shift and puts unnecessary strain on the other, more expensive drivetrain parts. It’s a fact that rear derailleur springs and gear cables wear more quickly on bikes with unkept chains. Furthermore, a clean chain makes less noise, something that ends up helping you ascertain just where that new ‘click click’ noise is coming from.
What should you do? Degrease and clean your bicycle chain on a regular basis. Mountain bikes require cleaning more frequently while road bikes tend to need cleaning less frequently. Always degrease and clean your chain after any ride in wet weather conditions. Use an old paintbrush or toothbrush to remove all of the debris from your chain, chainrings, and cassette. Let degreaser (chain cleaner 250cc) soak into your drivetrain for a minute or two, scrub entire drivetrain with brush, and then gently rinse off the black nasty result with water from a low-pressure hose. Let the chain and drivetrain completely dry (about 20-30 minutes). Using a tool known as a chain keeper allows removal of the bicycle’s rear wheel, which gives unobstructed access to all areas of the drivetrain.
2. Lube it
After your chain is clean and completely dry, you need to lube it in order to keep it happy. The biggest mistake most people make is to lubricate the entire drivetrain (chainrings, cassette, derailleur, chain, etc.,). This is absolutely wrong as the ONLY part that needs lubrication is the chain itself. Choose a chain lubricant that is suitable for the riding conditions in your area. I find that in Thailand a dry lube works best for most of the year (on Road and MTB bikes) and I only apply wet (or wax-based) lubricant on hard MTB rides where I know I will experience puddles, river crossings, or other wet conditions.
What should you do? Apply lubricant to the chain, wipe excess lube away with cloth while backpedaling, and then allow sufficient drying time (2 hours or overnight if possible).
3. Lube it WHERE and WHEN it’s best
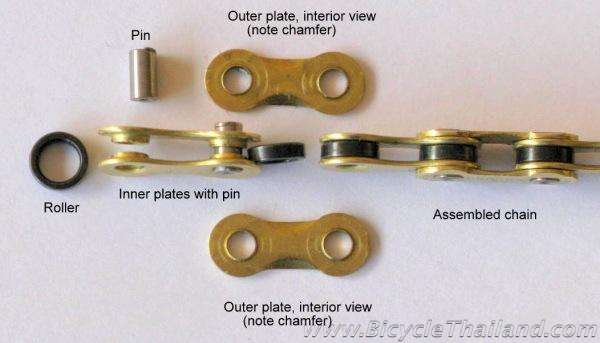
At a lot of races and friendly rides, I watch in disgust as people apply a heavy coating of chain lubricant to all areas of their drivetrain just before setting off on the road or trail. First off, chain lube is meant to be applied to the moving parts of the chain, specifically the pins (sometimes called rivets) and the rollers. It is unnecessary to apply lubricant to the inner or outer plates of the chain. Furthermore, applying lubricant just before setting off on a ride is the best way to ensure that much of the lube gets flung onto the other parts of your bike (rear wheel, brake pads, frame, etc.,) and dirt/road debris gets stuck to the remaining lube left on your chain. Putting lube onto your chain just before a ride turns your bike into a greasy mess and transforms your chain into a sandpaper covered cutting tool that will cause premature wear to the rest of your drivetrain parts.
What should you do? Apply chain lubricant only to the moving parts of the chain and then allow sufficient drying time of the lubricant prior to going out for a ride.
4. Replace it before it’s too late
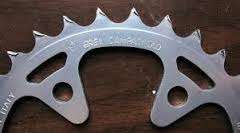
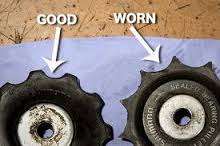
Everything has a lifespan. Chains are no exception. Keeping your chain clean and lubricated will definitely extend the life of your chain and all other drivetrain parts. But, when it does come time to replace the chain it is best to do so before it starts to cause significant wear to the chainrings, gear cassette, and derailleur jockey wheels on your bike. If the teeth on any of these parts look like curved shark fins or fine points, it’s already too late and you will need to replace them along with the chain. Not doing so will only result in the newly installed chain ‘skipping’ or experiencing ‘chainsuck’ when interacting with the worn parts.
What should you do? Keep track of your chain wear and replace your chain before the links start to stretch. Invest in a chain checker tool and learn to use it or have your local bike shop check it for you. Usually, chain stretch will occur sometime after the 3,000 kilometer wear point of your chain, but it could happen sooner (if chain has not been taken care of) or much later (if chain has been well taken care of). How fast a bicycle chain wears down depends on several factors: quality of chain, rider weight, style of riding, riding conditions, exposure to corrosive elements (salt air), etc.,
5. Install a Power Link / Master Link
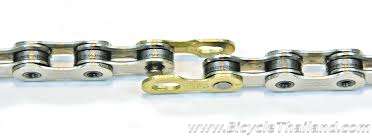
If your bicycle chain did not come with a Power Link (sometimes called a Master Link) then have one installed by your local bike shop. Several bicycle chain manufacturing companies make these and include them with most models of new chains. They’re available for 8, 9, 10, and even 11-speed chains. SRAM made them popular and now even KMC is using them with all of their chains. Shimano doesn’t include them with their chains and advises against using other brands of them with Shimano chains but many cyclists have successfully used KMC, SRAM, and even YBN chain Power Links with Shimano chains. Once installed, the Power Link makes it easier to remove and install your bicycle’s chain for purposes of cleaning and lubricating.
What should you do? Inspect your bicycle chain to see if it already has a Power link installed. If not, then have your local bike shop install one for you and ask them to show you how to remove and install it yourself. Once you’re familiar with how to manipulate the Power Link yourself it becomes quite easy to remove and care for your chain properly.
Ditto your habit of wiping the chain first, before applying fresh lube. It only makes sense to wipe off all the gross dirt/greasiness first. Then the lube, then a final wipe-down.