


So after having read through last month's article about the 11 Must Have Tools for Every Bicycle Mechanic you've either decided to leave your bicycle's repairs up to the professionals or delve deeper into your pocket in order to complete your own personal tool collection in an effort to become 'Bicycle Repairman'. Sorry, I just can't get enough of that clip.
This list of 9 must-have tools is for a bicycle mechanic who has graduated to an advanced level of wrenching on bicycles. Many, if not all, of the tools listed here require training from a skilled hand on their particular use as the tools themselves DO NOT come with instructions. These 9 tools will equip you to be able to perform most of the advanced maintenance procedures associated with 90% of bicycles being produced today.
1. Cone wrenches
In order to get into those hard-to-reach slots on hub axle cones you are going to need a good set of cone wrenches. Front hubs usually require a 13mm on the axle cone and a 15mm for the locknut.
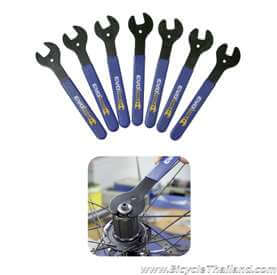 Rear hubs usually require a 15mm on the axle cone and a 17mm for the locknut. If your bicycle's hubset is standard, start off by purchasing three cone wrench sizes: a 13, 15, and 17mm will do a majority of hubsets being manufactured today. If your bicycle's hubset is NOT standard purchase an entire 'set' of cone wrenches that will include every size from 13mm up to 19mm. Don't bother with the compact cone wrenches that have one size on each end of the wrench because inevitably you'll need BOTH sizes at the same time. Most professional bicycle mechanics will have two of each size cone wrench and in some cases they will actually grind the width of one wrench down to allow it to fit into tighter spaces. This becomes especially useful when working on rear hubs that have little to no gap between the axle cone and the locknut. Adjusting axle cones and their locknuts to attain proper bearing function is a skill that comes from proper instruction and repetition.
2. Chain whip
All modern bicycles have a separate cassette and freehub system, as opposed to older systems which saw an integrated rear freewheel.
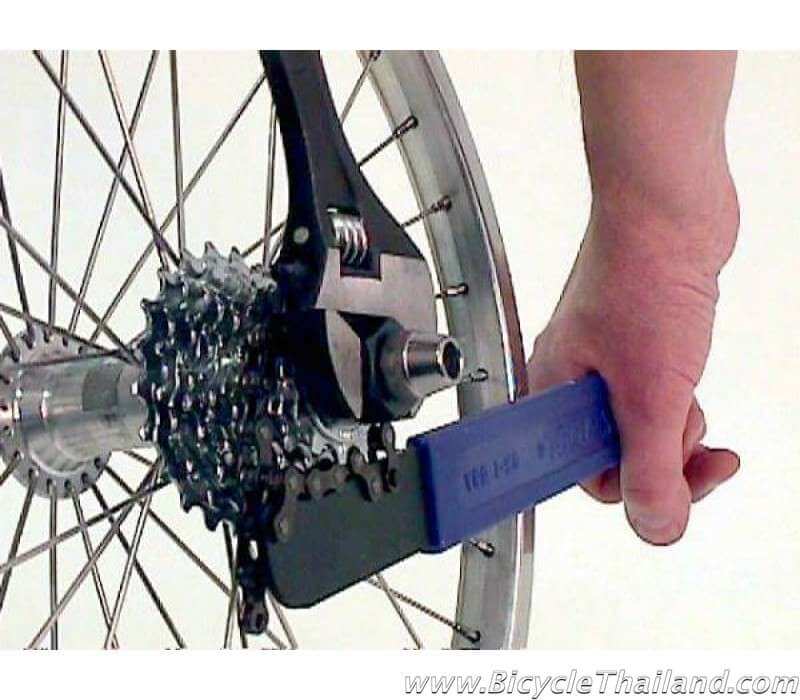 Among the benefits of the new system is the ability to replace the cassette several times over many seasons without having to also replace the bearing/ratcheting paw system that traditionally lasts much longer. In order to separate a cassette from its freehub you will need to have a chain whip and a cassette lockring removal tool. The chain whip is used to hold the cassette in place, preventing its rotation, during the process of loosening the cassette lockring with a cassette lockring removal tool. When reinstalling the cassette lockring you will find that it is not necessary to utilize the chain whip as the cassette's direction of rotation does not inhibit the ability to tighten the cassette lockring.
3. Cassette lockring removal tool (Freewheel tool)
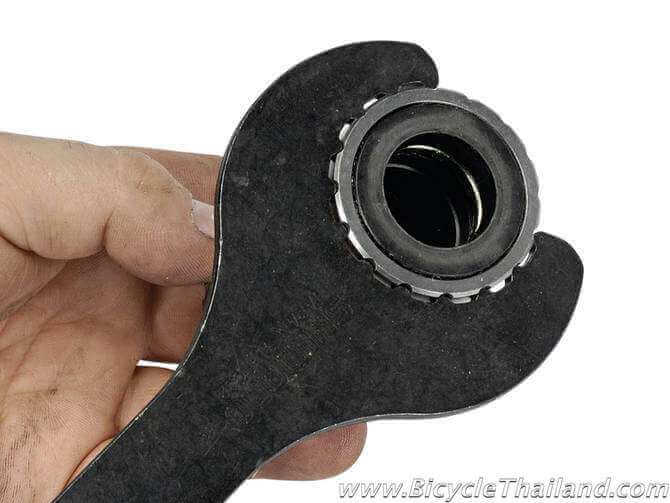
A cassette lockring removal tool, or what is mistakenly sometimes called a freewheel removal tool, is used in conjunction with a chain whip to separate a cassette from a freehub, as discussed previously. Cassette lockring removal tools come in several different designs and are patterned to only fit with certain lockrings (i.e. a Shimano removal tool fits ONLY Shimano cassettes and so on). Park Tool company offers arguably the best selection of cassette lockring removal tools. Once again, one particular model, the FR-5, will accomplish cassette lockring removal on 90% of modern bicycles. Fill out your toolbox with other models as you find a need for them or if you're planning to work on unique and older style bicycles/freewheels. A basic 12-inch adjustable crescent wrench will work great with any cassette lockring removal tool but the best practice is to mount the lockring removal tool in a workbench mounted vice, hold the cassette from rotating with a chain whip, and turn the wheel itself in order to loosen the cassette lockring.
4. Bottom bracket tool
Every bicycle has a bottom bracket, and sooner or later the bottom bracket on your bicycle is going to start creaking. Many home mechanics are a bit intimidated by the idea of tearing into their bicycle's bottom bracket because of the complexity of removing the bike's crankset. But rest assured, once the crankset is off the bicycle bottom bracket is very easy to remove, inspect, clean and grease, and reinstall. Part of the reason for the ease of bottom bracket removal and installation is due to the move towards 'sealed' bottom bracket units and the bicycle industry's bottom bracket standardization efforts.

Determine what kind of bottom bracket your bicycle has installed and then purchase the appropriate removal tool from a high quality bicycle tool manufacturer like Park Tool.
5. Rear derailleur hanger alignment tool
The shifting on your rear derailleur has become erratic, you experience 'chain slip', and/or your up and downshifts are no longer smooth and noise free. Replacing your gear cables is a great first step in troubleshooting these and other gear shifting problems but NEVER forget that a misaligned rear derailleur hanger could be, and usually is, the culprit when dealing with rear derailleur shifting problems.
A rear derailleur hanger alignment tool threads directly into the hanger on your drive side rear dropout.
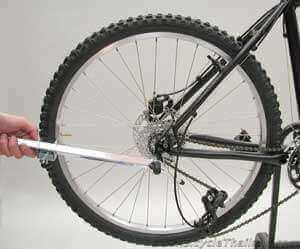 The rear derailleur must be removed in order to mount this tool. A distance pin gauge on the alignment tool is then positioned against four separate points on the rim of the rear wheel to assess whether the derailleur hanger on the bicycle is running parallel to the rear wheel. Minor adjustments can be made to the hanger by using the leverage of the alignment tool to bend the hanger back into its original 'true' position. Since most derailleur hangers are now made of aluminum, and are meant to breakaway in severe cases of impact to prevent expensive derailleur damage, these minor adjustments can only be made a few times before the material becomes overstressed and breaks. Although some mechanics see the cost to benefit ratio of simply replacing bent aluminum derailleur hangers with new ones over purchasing this tool, the ability to straighten steel and frame-joined hangers makes this tool an indispensable addition to any mechanic's toolbox.
6. Headset cup press
Back in the day headset cups were installed using copper hammers. Damage and surface marring were negligible because the copper hammerhead was softer than the material used to manufacture headset cups, namely steel.
 Now that headset cups are being manufactured out of increasingly lighter weight materials mechanics need a precision tool that applies equal pressure across the surface of the cup while fitting it to the tight tolerances of modern frame headtube design. A high quality headset cup press does just that. Attempting to fit a headset made from any other material than steel without a headset cup press is sure to result in headset and/or frame headtube damage.
7. Headset cup remover
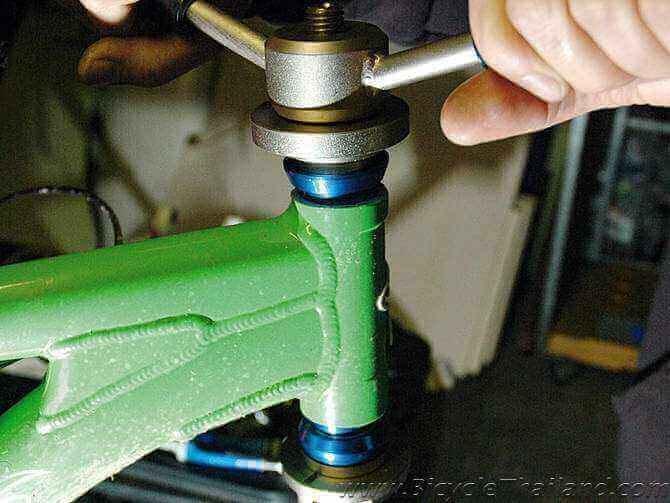
Installing the headset cups is easy and safe once you have a cup press, but removing headset cups requires a completely separate tool from #6 above.
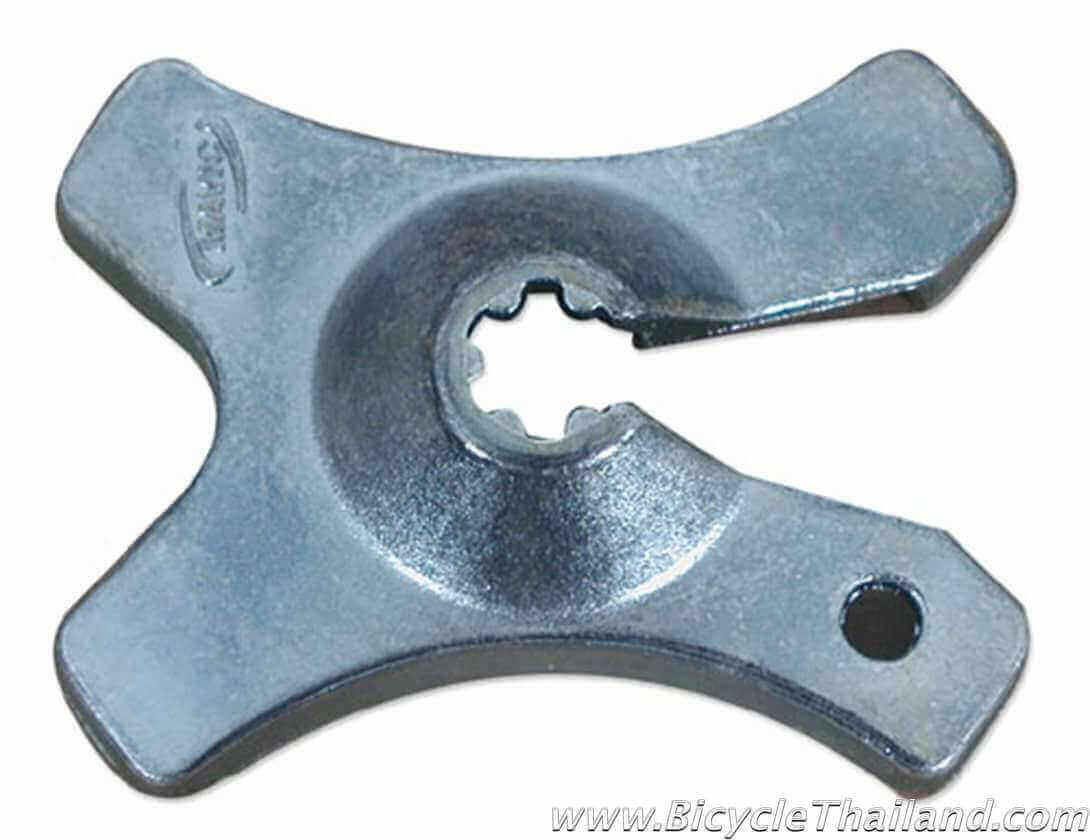
 The headset cup remover is a simple tool that requires about 10 seconds to figure out and even less time to make use of. The tool's splayed end is fit into the frame headtube and butted up against the interior lip of the headset cup. Hammer force is then applied to the non-splayed end of the tool and voila' the headset cup is released from its constrictive confines and immediately shoots across the workshop to places unknown, never to be found.
Using a large bladed screwdriver in place of this tool is very tempting for many mechanics. If you plan to go this route you should consider that doing so will result in damage to the interior surface of your frame headtube and the lip of the headset cup (not so bad if you are replacing it anyways) and most probably some type of damage to the blade of your screwdriver. You may be able to alleviate some of this damage by rubber-coating the blade or placing a cloth covering over the screwdriver before using it to tap out the headset cup.
8. Torque wrench
Get one. Use it. Nuff said. A torque wrench is used where the tightness of screws and bolts is crucial. It allows the operator to measure the torque applied to the fastener so it can be matched to the specifications for a particular application. This permits proper tension and loading of all parts.
Where are you going to use a torque wrench the most on a bicycle? Handlebars, stems, disc rotor bolts, brake caliper mounting bolts, and front derailleur clamp bolts. And guess what, most of those use a 5mm hex wrench so look for a torque wrench that comes with a 5mm hex wrench attachment and does the full range of newton metres (Nm) that your specific bicycle parts require. Example: stem bolts are usually in the 4-5Nm range. Check your owner's manuals for other torque values for the specific parts on your bicycle. Many parts have the torque value stamped on them.
Proper use of a torque wrench is just as important as having one. If you don't use the tool correctly it really is unnecessary to even have it. The most important thing to remember when using a torque wrench is to make all tensions with a smooth, controlled motion until the desired Nm value is reached. Stopping mid stroke, making several small jerky movements, and hesitating just before the value is reached and finishing it off with a final push are all examples of bad torque wrench use.
I would recommend purchasing an Electronic or Click type model of torque wrench for use on a bicycle. Those mechanics with a bit more experience, and a steadier or at least more practiced hand, can search out a Beam type torque wrench. Beam type will be the least expensive while Electronic will be the most expensive.
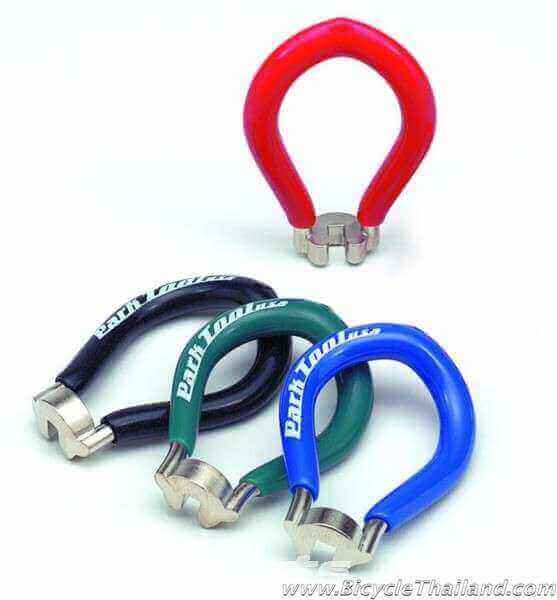
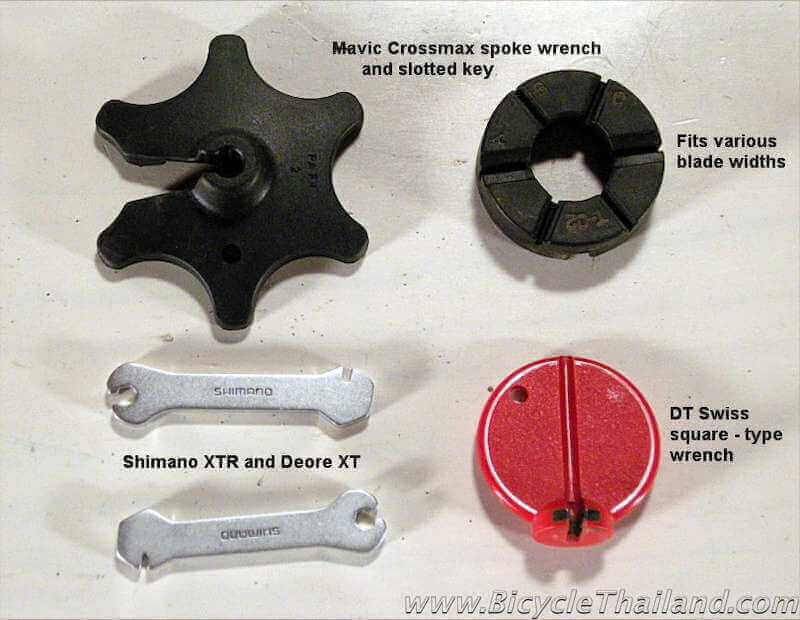
9. Spoke wrenches
Spoke tension is critical for proper wheel function. There have been books written on how to build a wheel, how to true a wheel, and how to build and true the perfect wheel. If you really like reading and you also like the idea of confusing things being made MORE confusing by placing them in written and diagram form than by all means go purchase one or all of those books and begin your journey towards madness.
No, wheel building and truing is not that complicated, but having read quite a few of those books before having had a professional instruct me on how to do it myself I must say that I found a good majority of what was in those books to be rather confusing. Reading those books AFTER I had been instructed by a professional made me feel as if the information was very good as referential material. Having those books around to refer to when building or truing a specific type of wheel was helpful. Reading those books from front to back like a 'Bicycle Wheel' novel wasn't helpful at all. I said all of that to say this; learn the 'How To' of wheel building and wheel truing from a professional, experienced hand, get the spoke wrench that fits the wheels on your bicycle, and read the section of the book that describes how to build/true wheels like yours.

 http://bicyclethaila...tmk-150x150.jpg
Spoke nipples come in various sizes (.127-.156 and larger), materials (aluminum, brass, etc.,), and even shapes (splined, Torx, square, etc.,). Spoke wrenches therefore come in various sizes and shapes in order to accommodate the traditional approach as well as the new attempts at spoke nipple design. Rubber-coated handle and high flange spoke wrenches are more comfortable to use over long periods of time. Emergency spoke wrenches can be small without rubber-coating but they should be of adequate size to allow full pressure from your thumb and forefingers. Some multi-tools have spoke wrench options that are completely worthless.
[SHARE]


