


The most important setting on any mountain bike suspension system is the sag. The sag is the amount by which the suspension compresses under the combined weight of the bike and rider. Proper sag is essential because it allows the suspension fork to absorb holes and bumps without making the fork too soft (can damage internal parts of fork) or hard (makes bike bounce like a pogo stick). Sag must be set on a newly purchased bike, after a new fork has been installed, or when a different rider makes use of a bike previously set for someone else.
What you will need:
[caption id="attachment_11849" align="alignnone" width="300"]
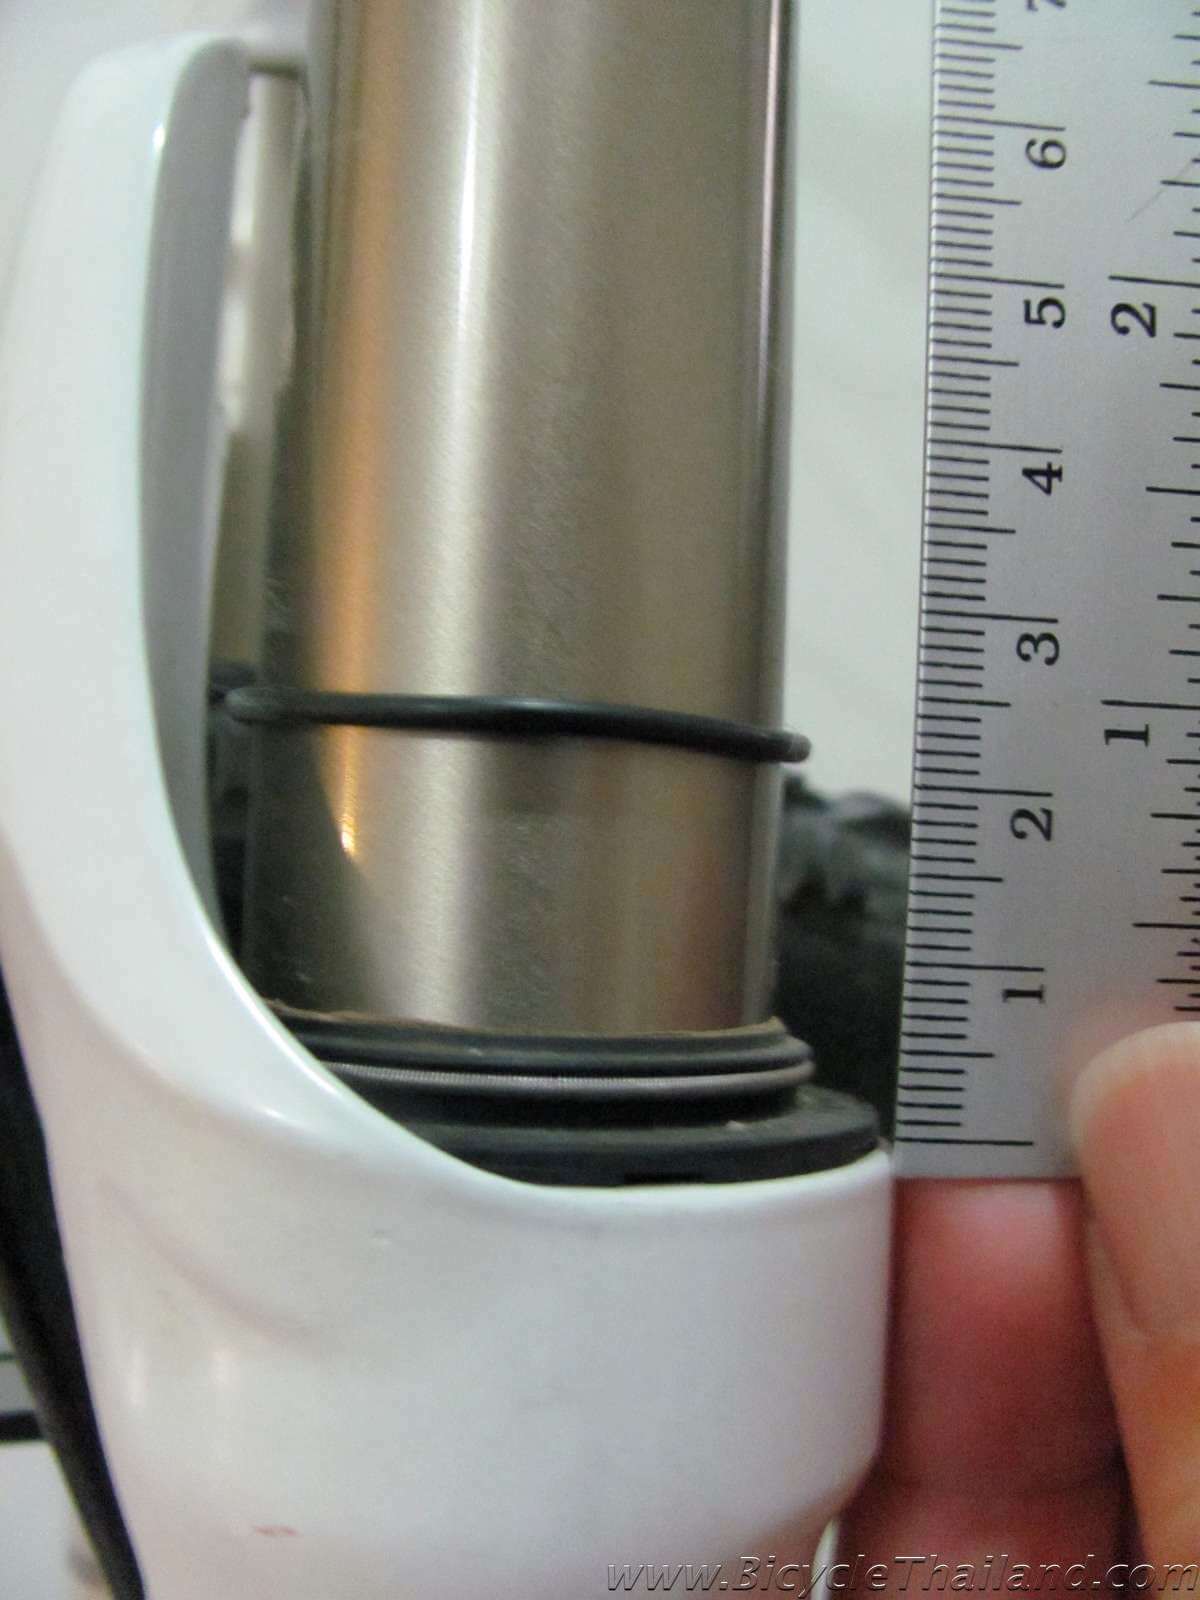
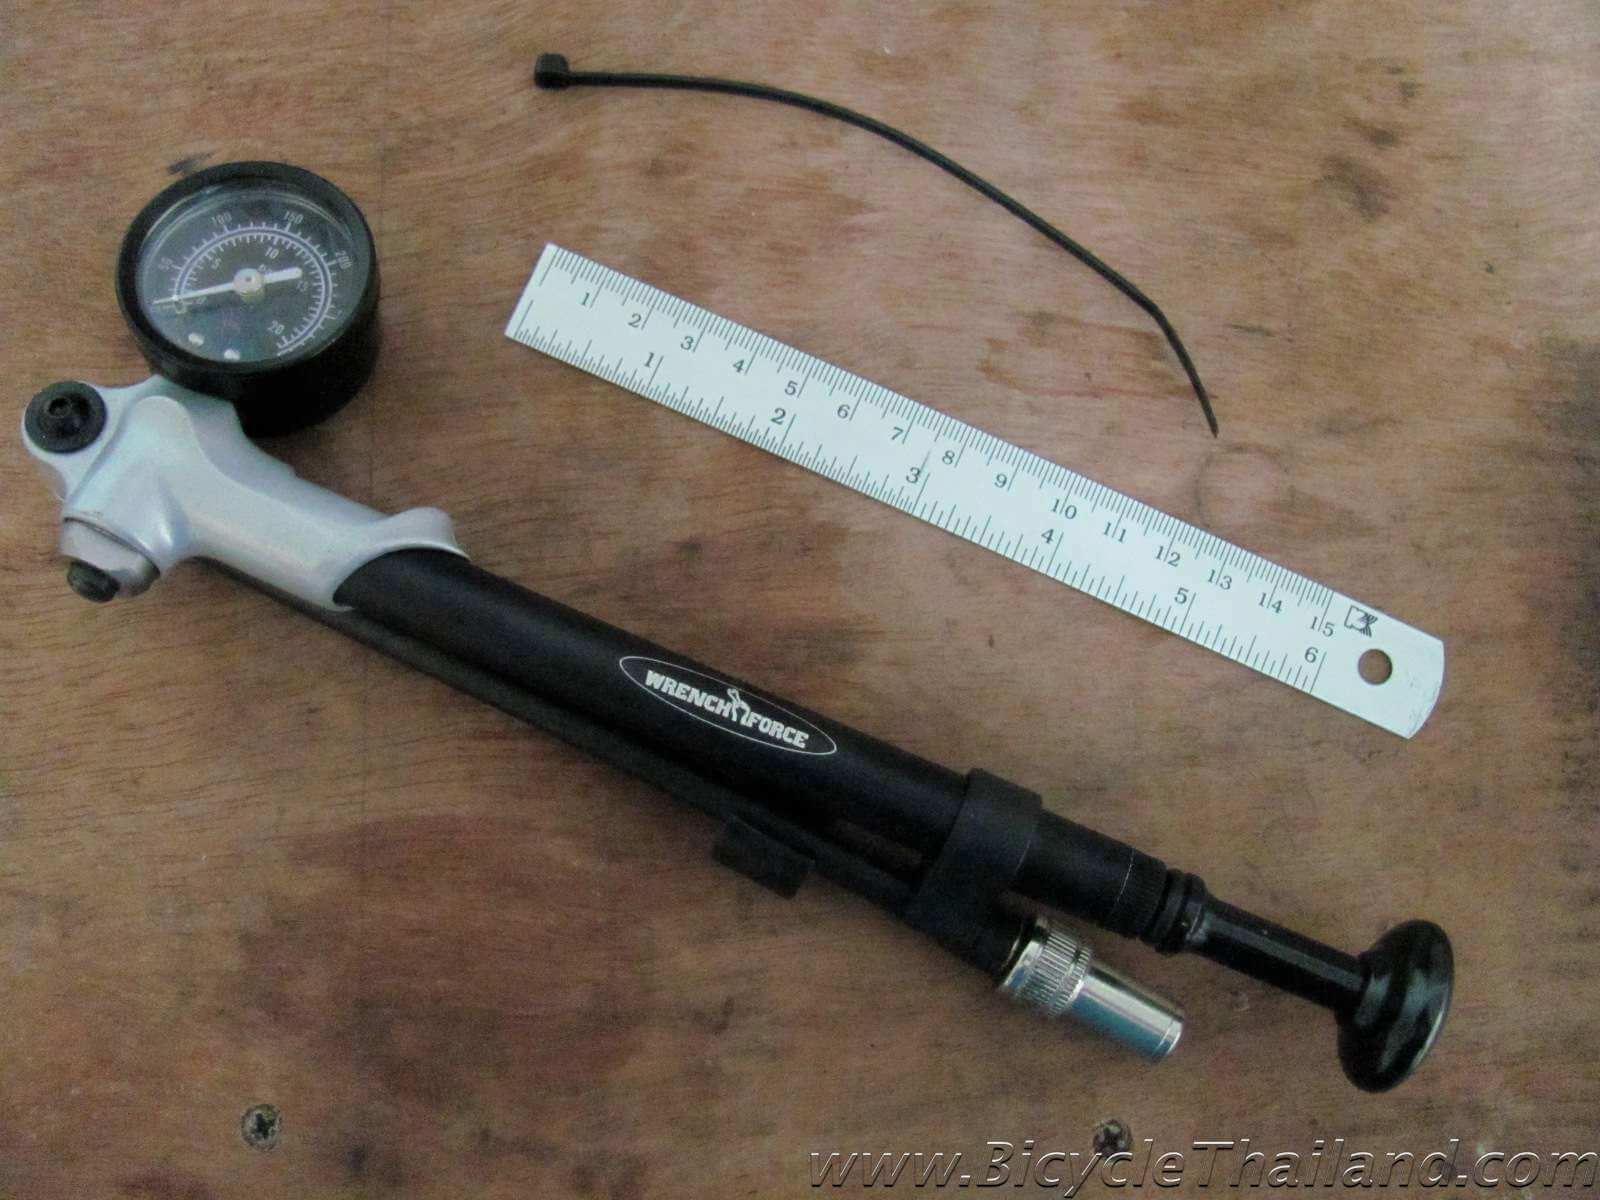 A shock pump, small ruler, and a zip tie is all you will need to set the sag on your MTB fork.[/caption]
Setting the 'sag' on your MTB suspension fork:
Step 1 - If there isn't already an O-ring on your fork's stanchion, you can use a zip tie. Slide the O-ring (or zip tie) all the way down the fork stanchion until it sits on top of the fork wiper seal.
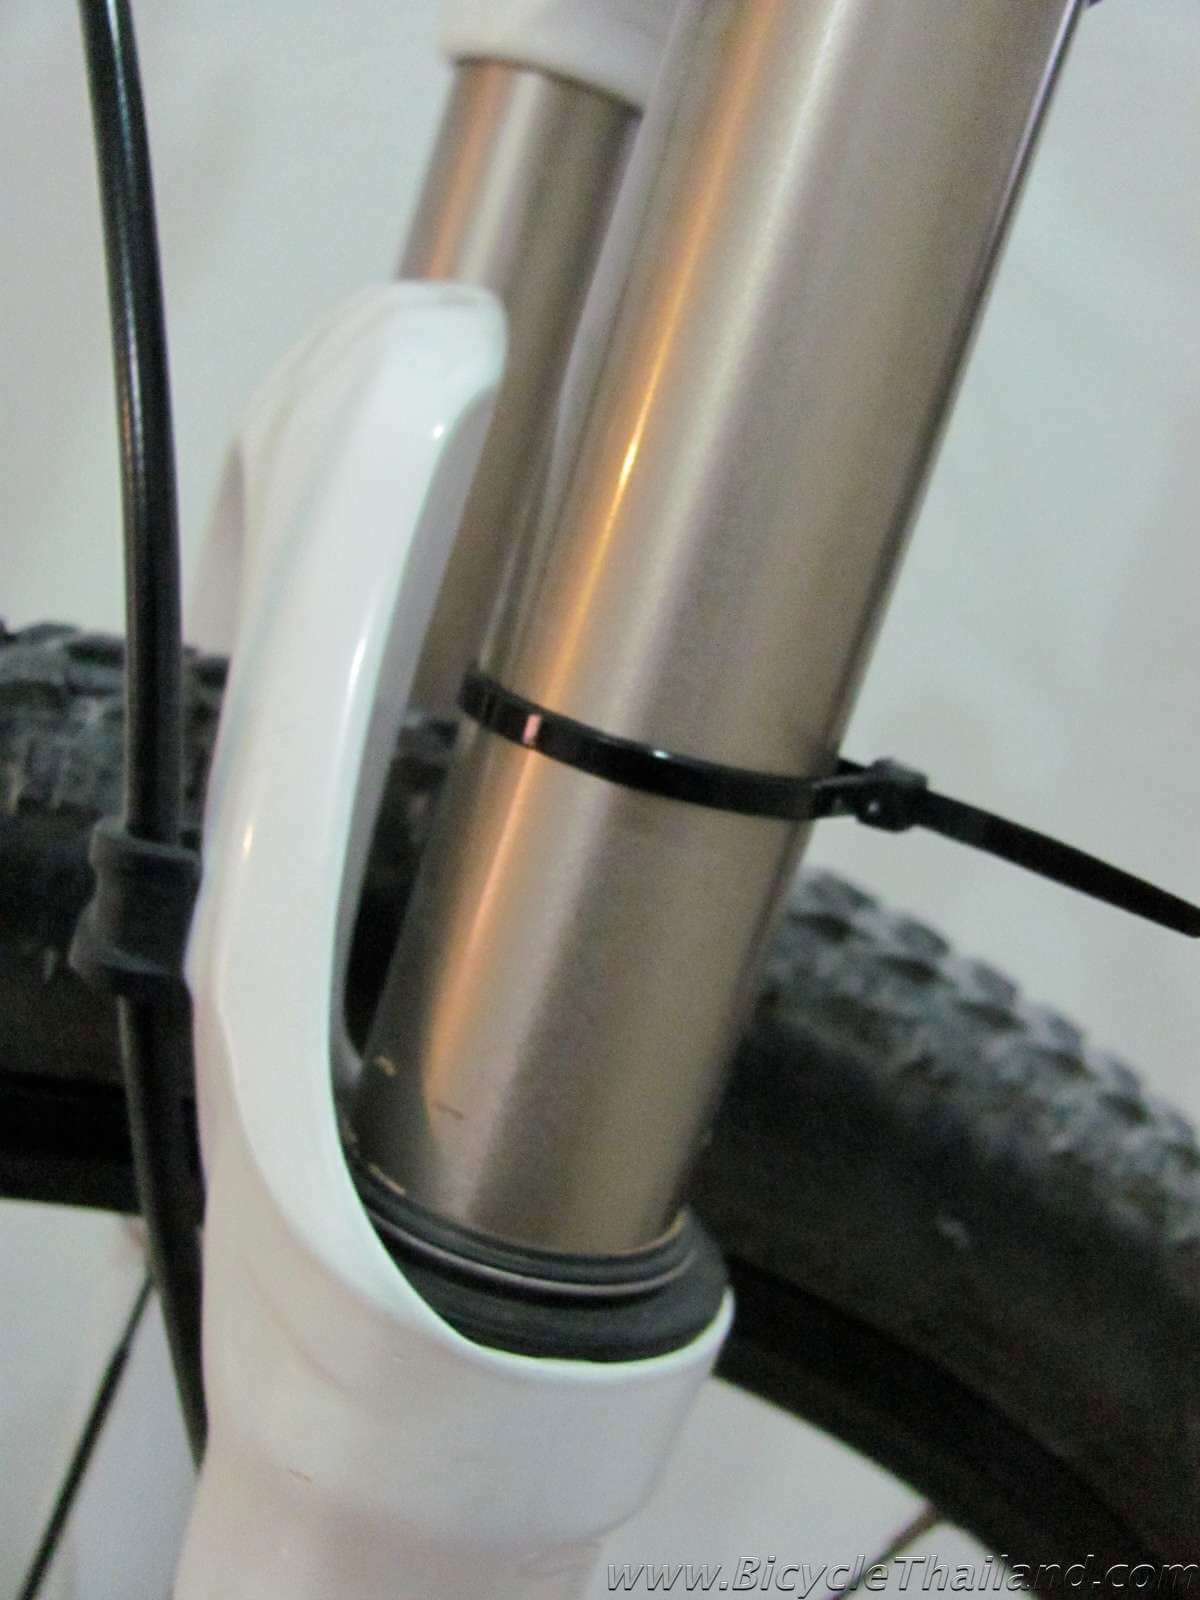
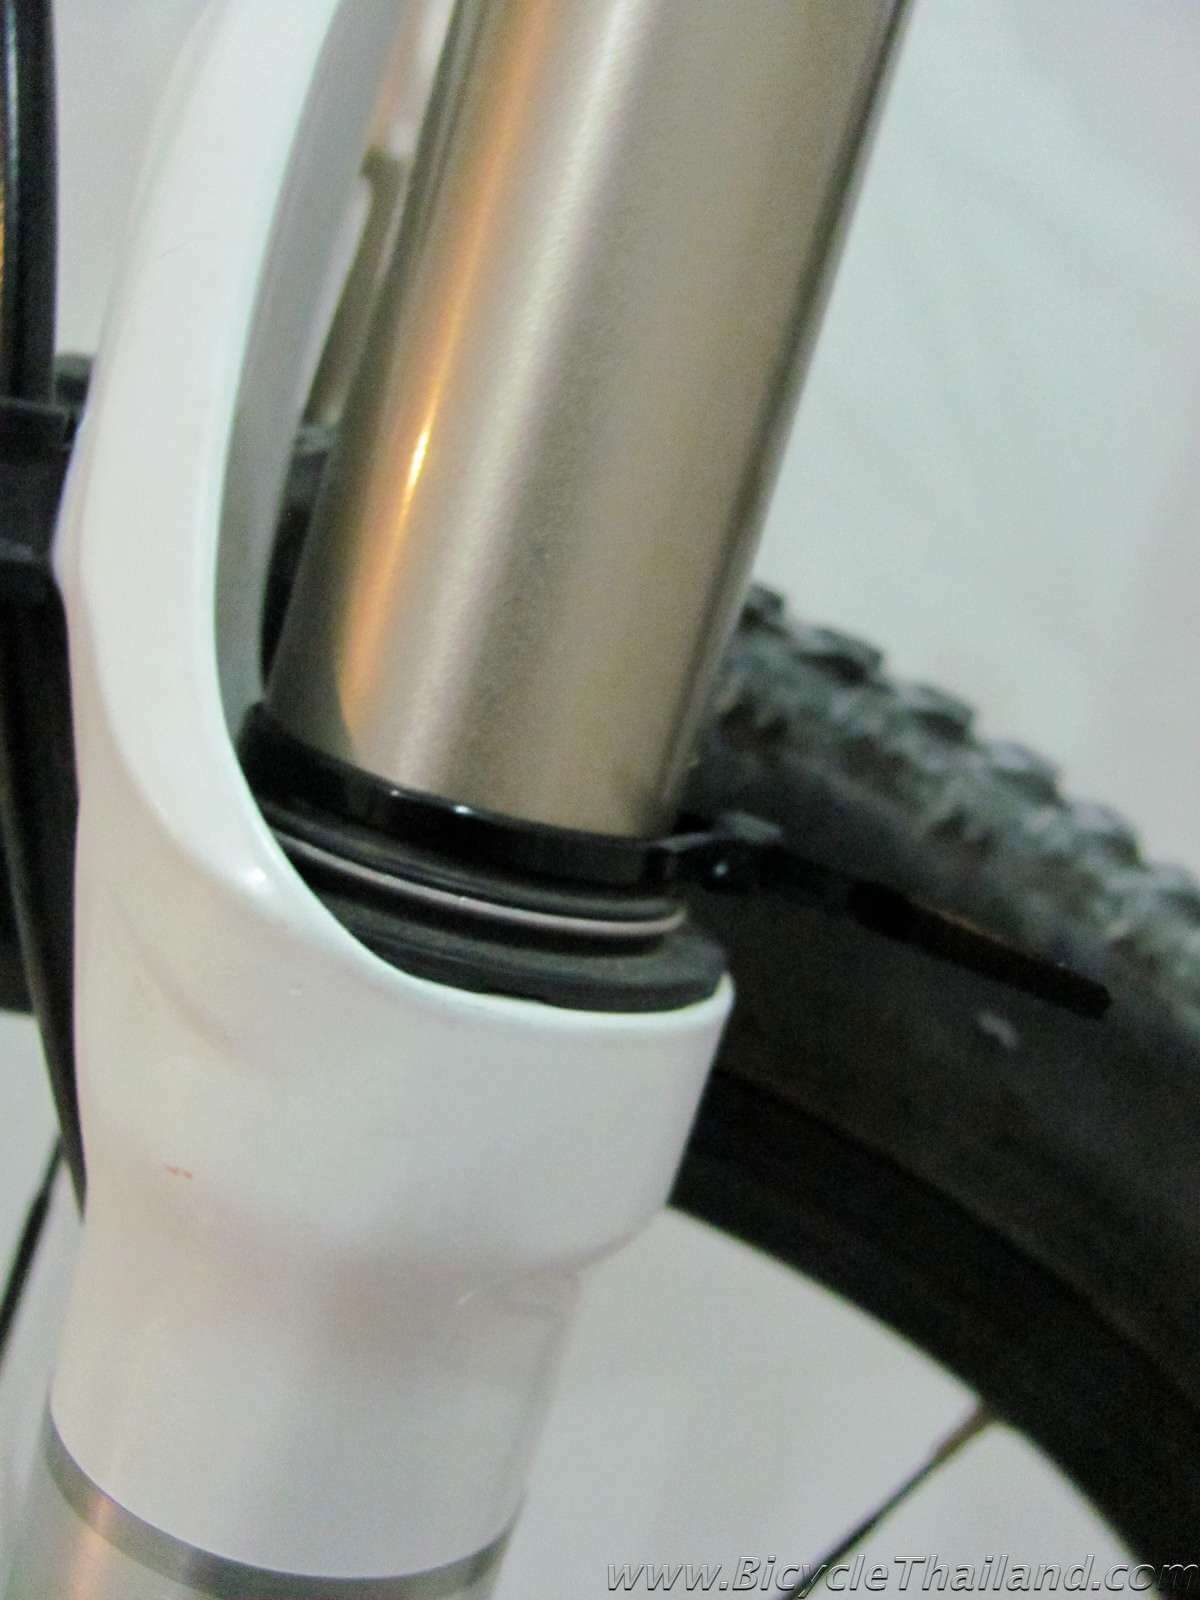
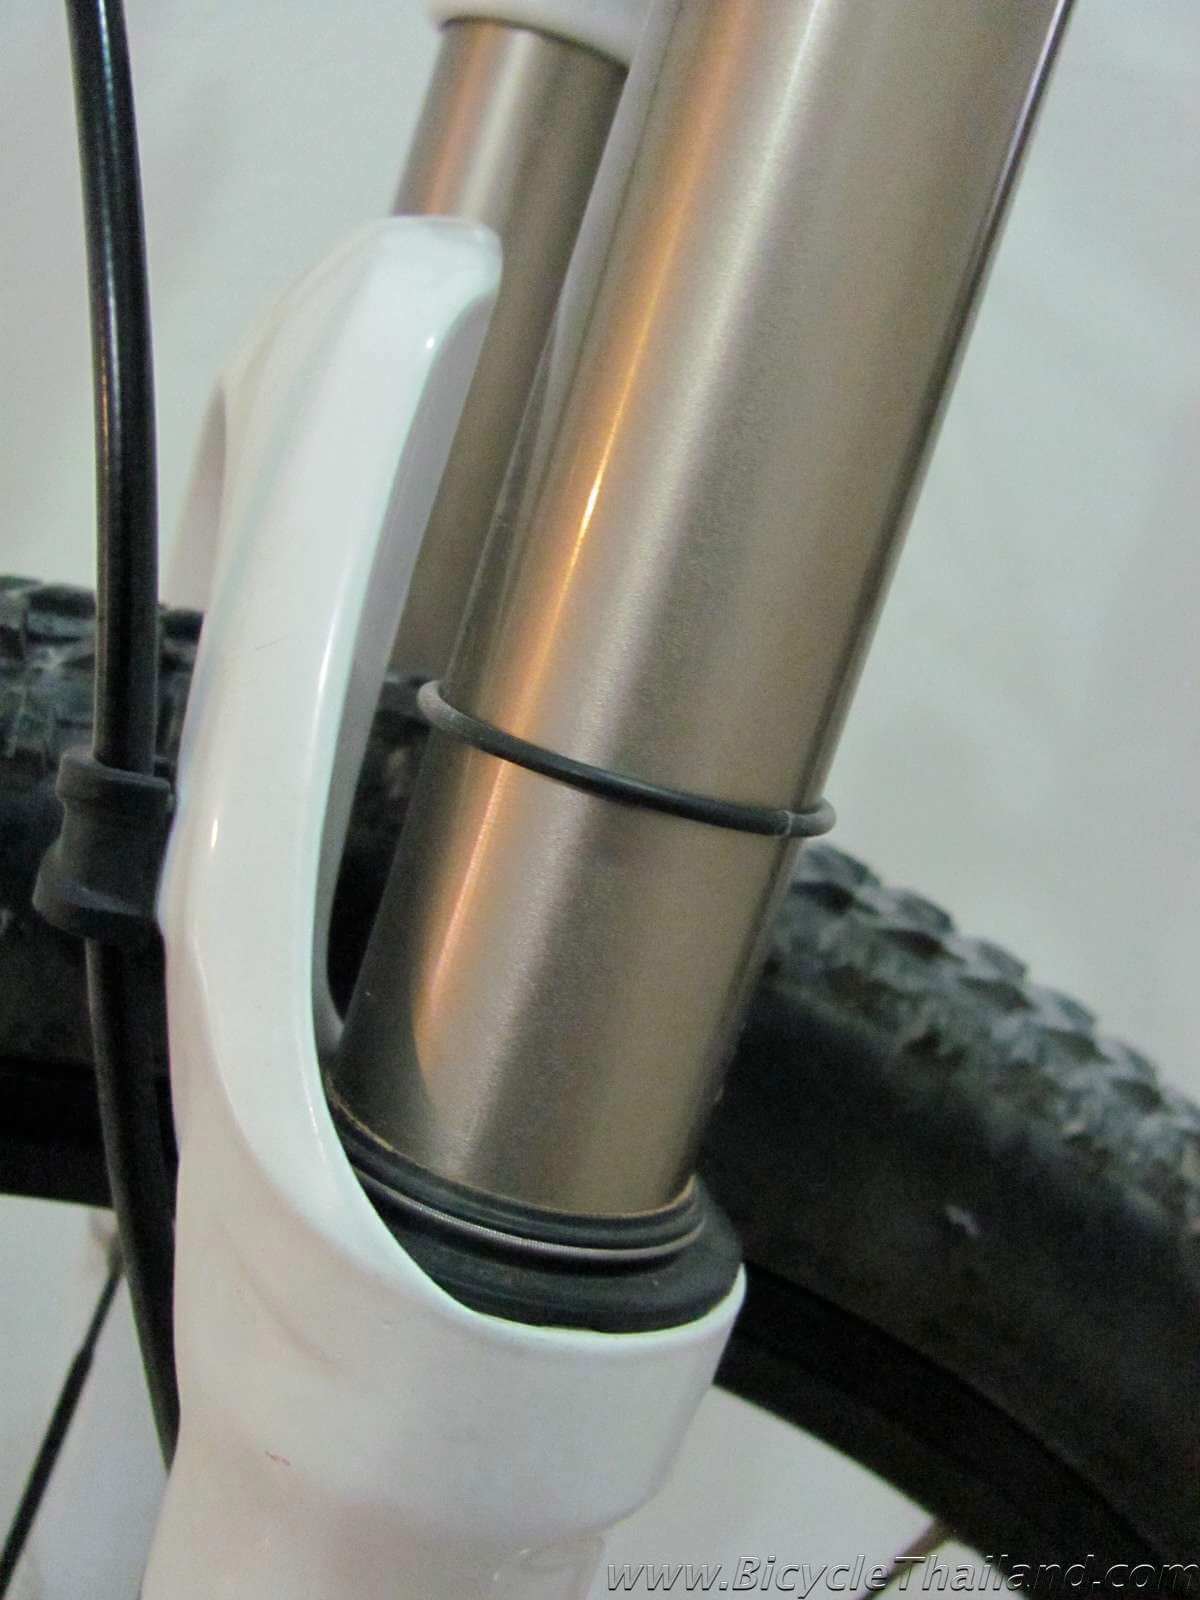
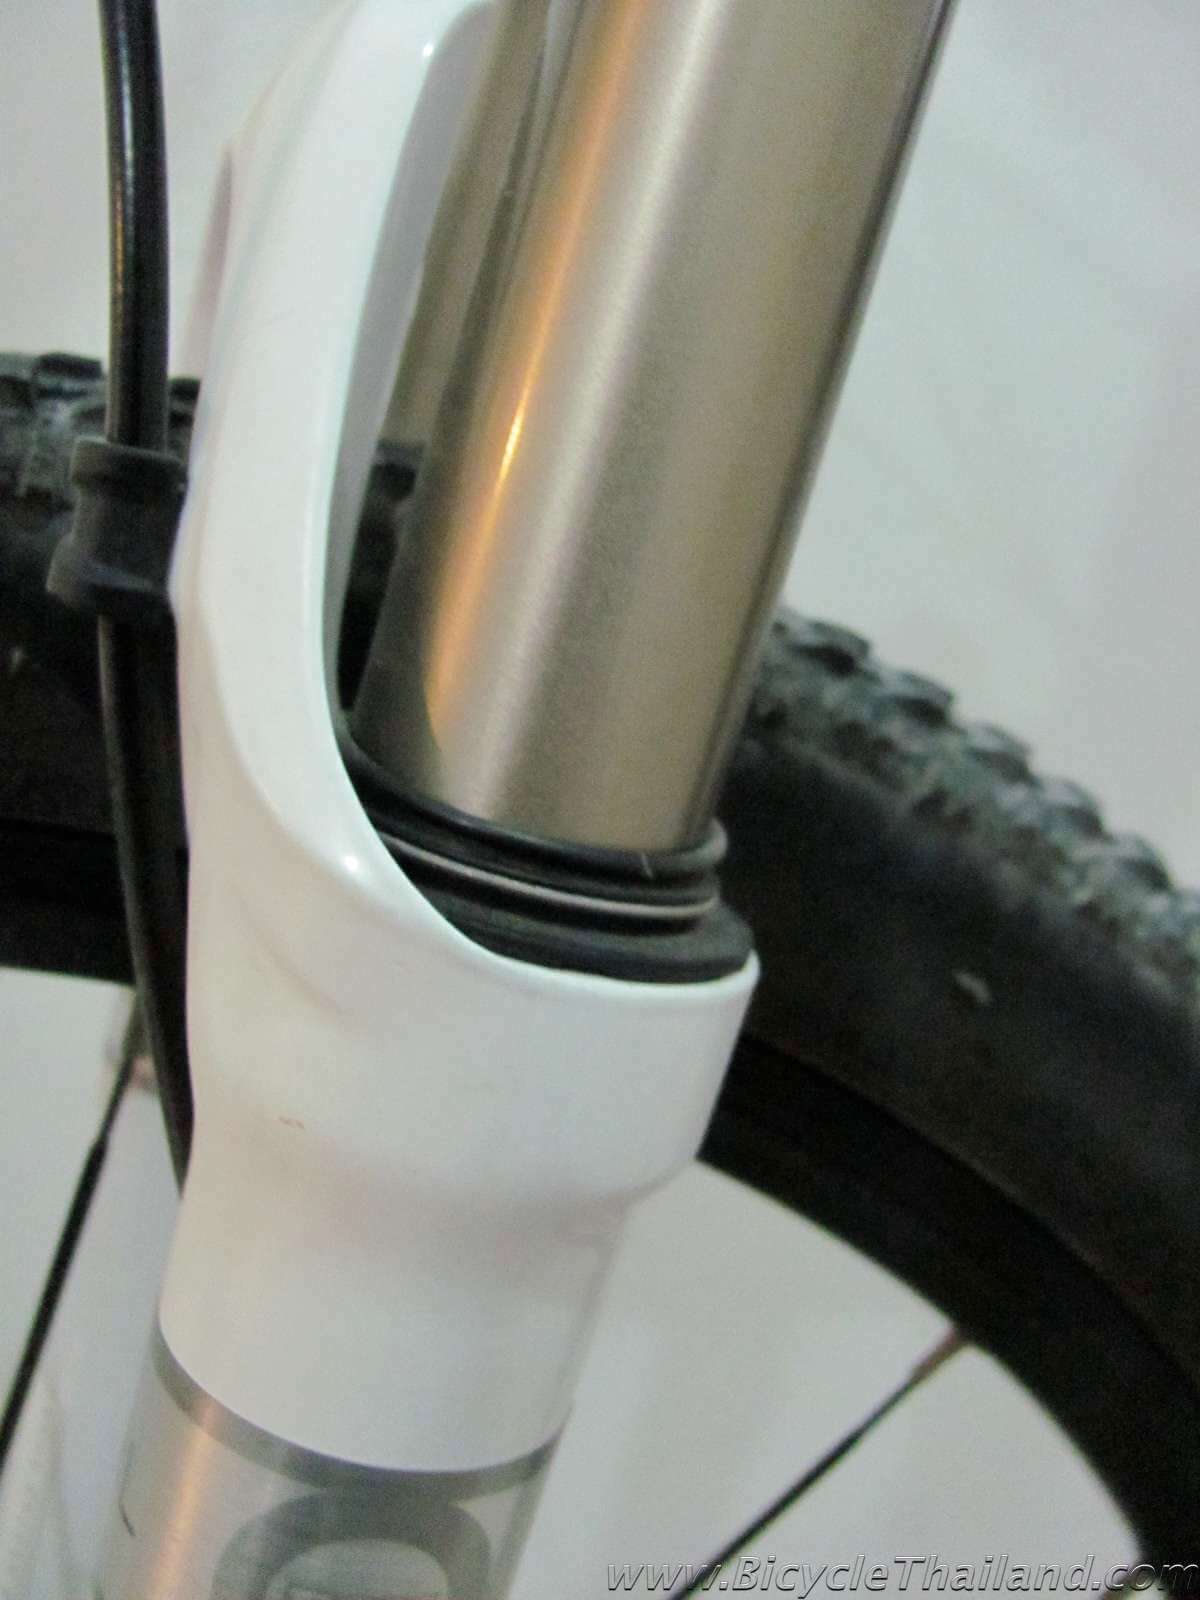
Step 2 - Prop yourself up against a wall with your hand and sit on the bike in your normal riding position. You want the fork to compress slightly from your weight and the weight of the bike, but try not to over compress the fork by leaning heavily on the handlebars when climbing on the bike during this step. If you do, simply reach down and reset the O-ring (or zip tie) to the top of the fork wiper seal while you are still seated on the bike.
Step 3 - Being careful not to compress the fork further, climb off the bike and measure the amount of sag at the fork leg. Sag should be between 15 and 25% of the total travel available, keeping in mind that the total travel of your fork will always be slightly less than the amount of stanchion showing. If you don't know the travel distance of your fork consult your owner's manual or manufacturer's website for this number. Most cross-country forks are 100 or 120 mm. Some racing forks are 90 mm, while trail bikes can be 140+ mm.
- Fork travel
- 90 mm
- 100 mm
- 120 mm
- 140 mm
- Sag setting
- 13.5 - 22.5 mm
- 15 - 25 mm
- 18 - 30 mm
- 21 - 35 mm

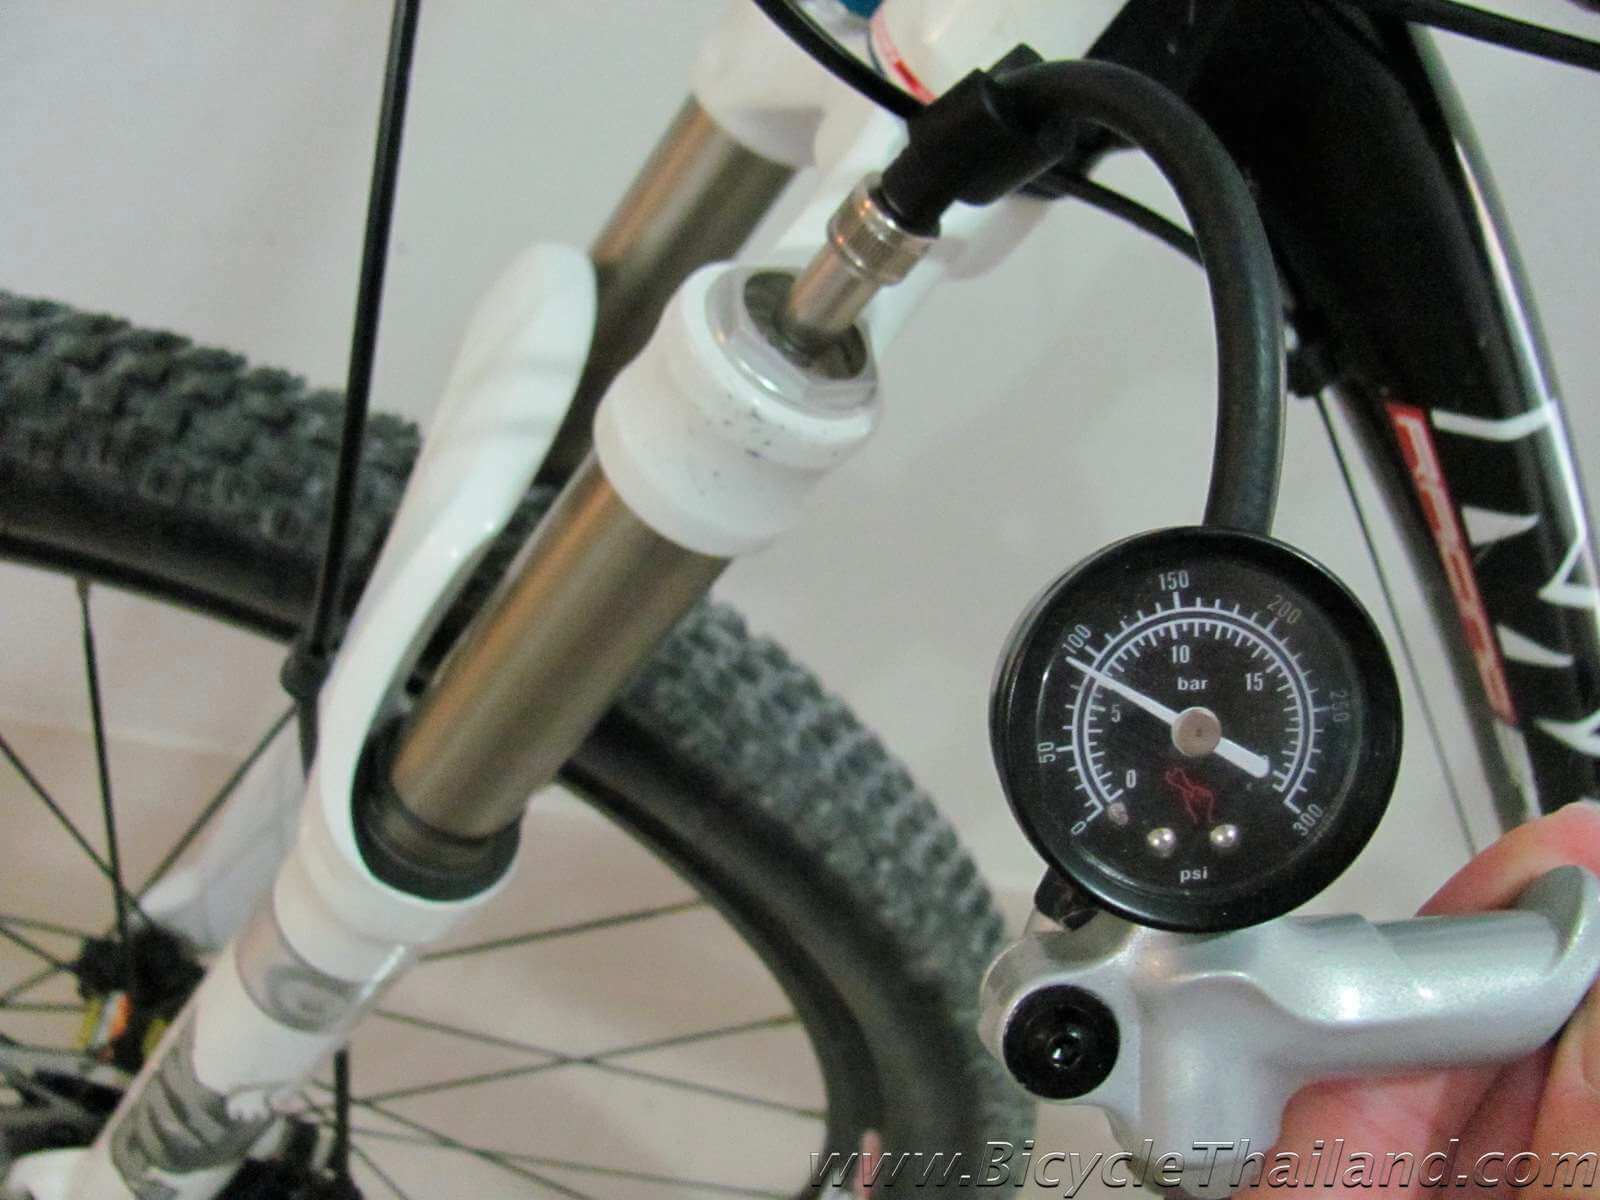
Step 4 - AIR SPRUNG FORKS ONLY. If you have air sprung forks, simply increase the air pressure in the fork to reduce the amount of sag, or decrease air pressure to increase sag.
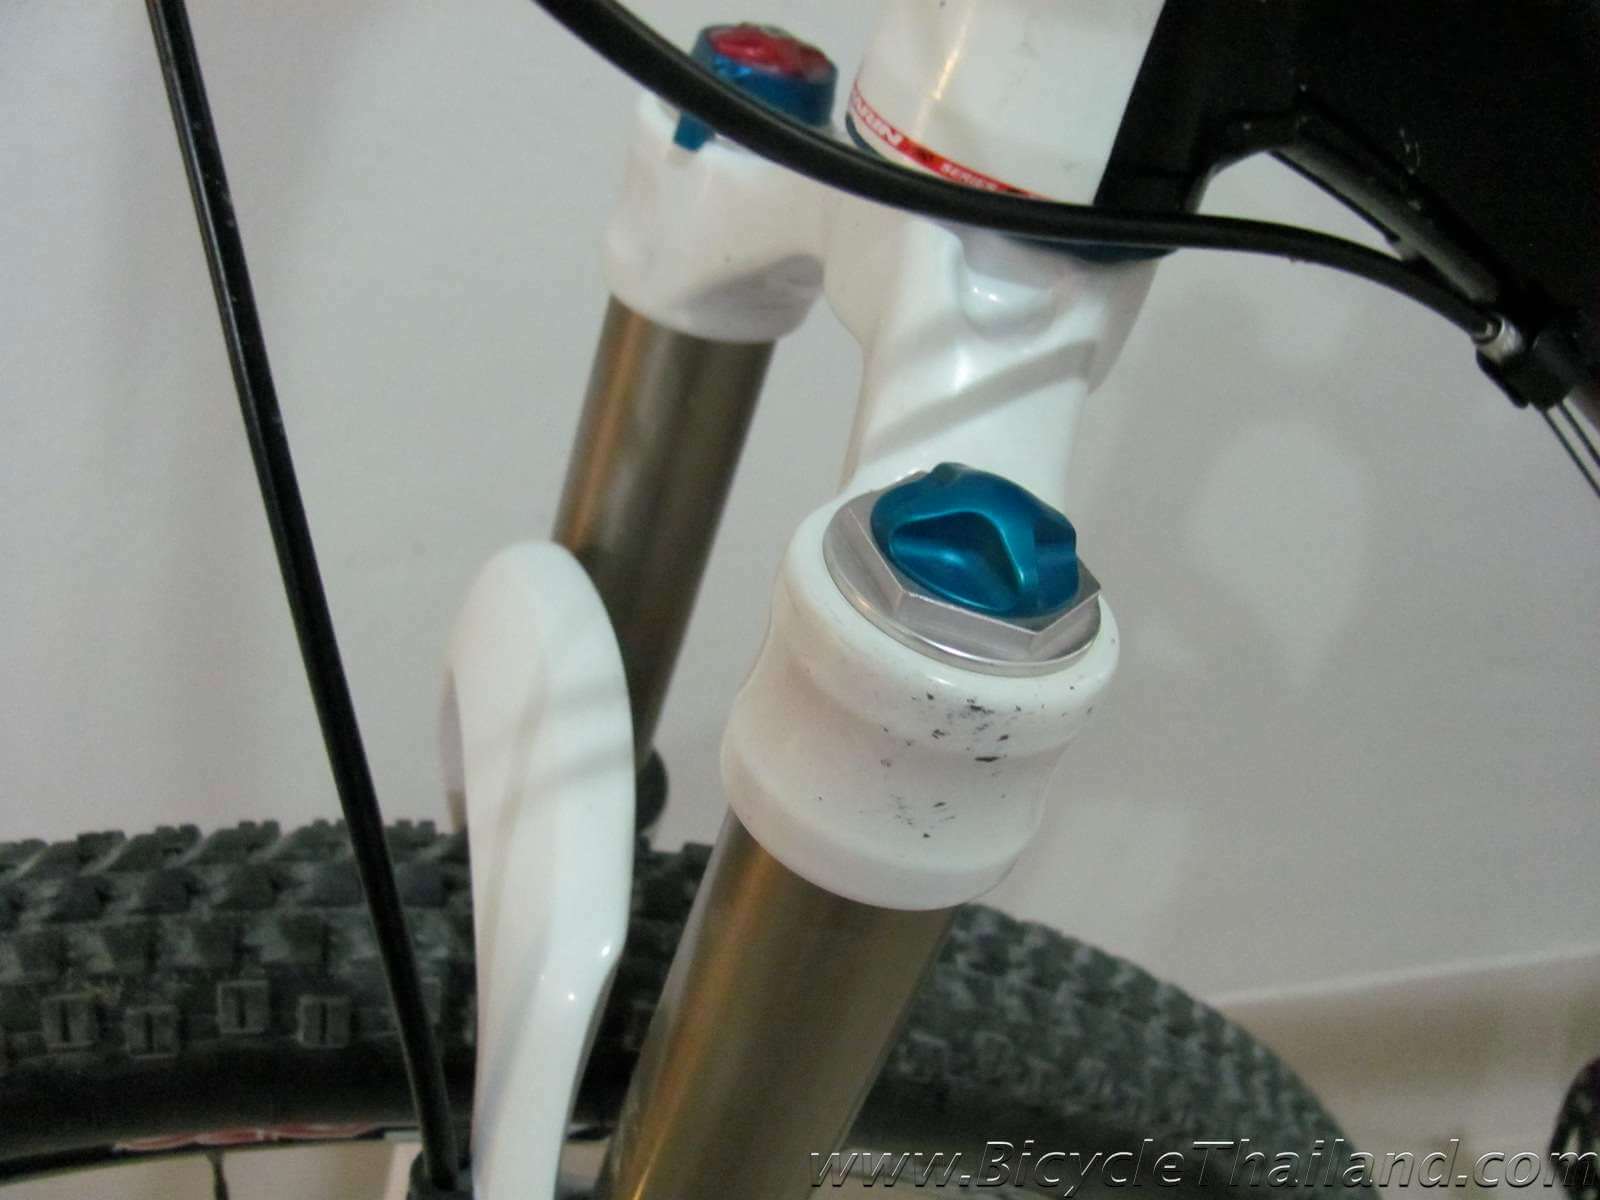
Step 5 - COIL (SPRING) SPRUNG FORKS ONLY. Coil sprung forks will normally have a dial on the fork crown that is used to pre-load the spring. If you find that the fork sags too much with the pre-load fully on (turned fully clockwise), you will need to install a firmer spring in your fork. If it sags too little with no pre-load (turned fully counter-clockwise), you will need to install a softer spring.
Step 6 - When the sag is correctly set, if you still find that the fork bottoms out more than a couple of times every time you ride, you will need to increase the compression damping. If your fork does not have adjustable compression damping, your only option will be to increase the air pressure (on Air sprung forks) or pre-load (on Coil Sprung forks) by repeating step 4 or 5.
Your sag is set, now go out and ride!
I used the words 'pre-load' and 'compression damping' in this step-by-step procedure and I would like to give further clarification of these suspension system terms to those who may find them initially confusing. Also, when discussing mountain bike suspension systems the words 'coil' and 'spring' are the same, but are used interchangeably quite often in order to avoid saying 'Spring Sprung Fork' and the 'Spring Spring Rate.' Do those make any sense? No, they don't, so instead the word coil is used in order to say 'Coil Sprung Fork' and the 'Coil Spring Rate.'
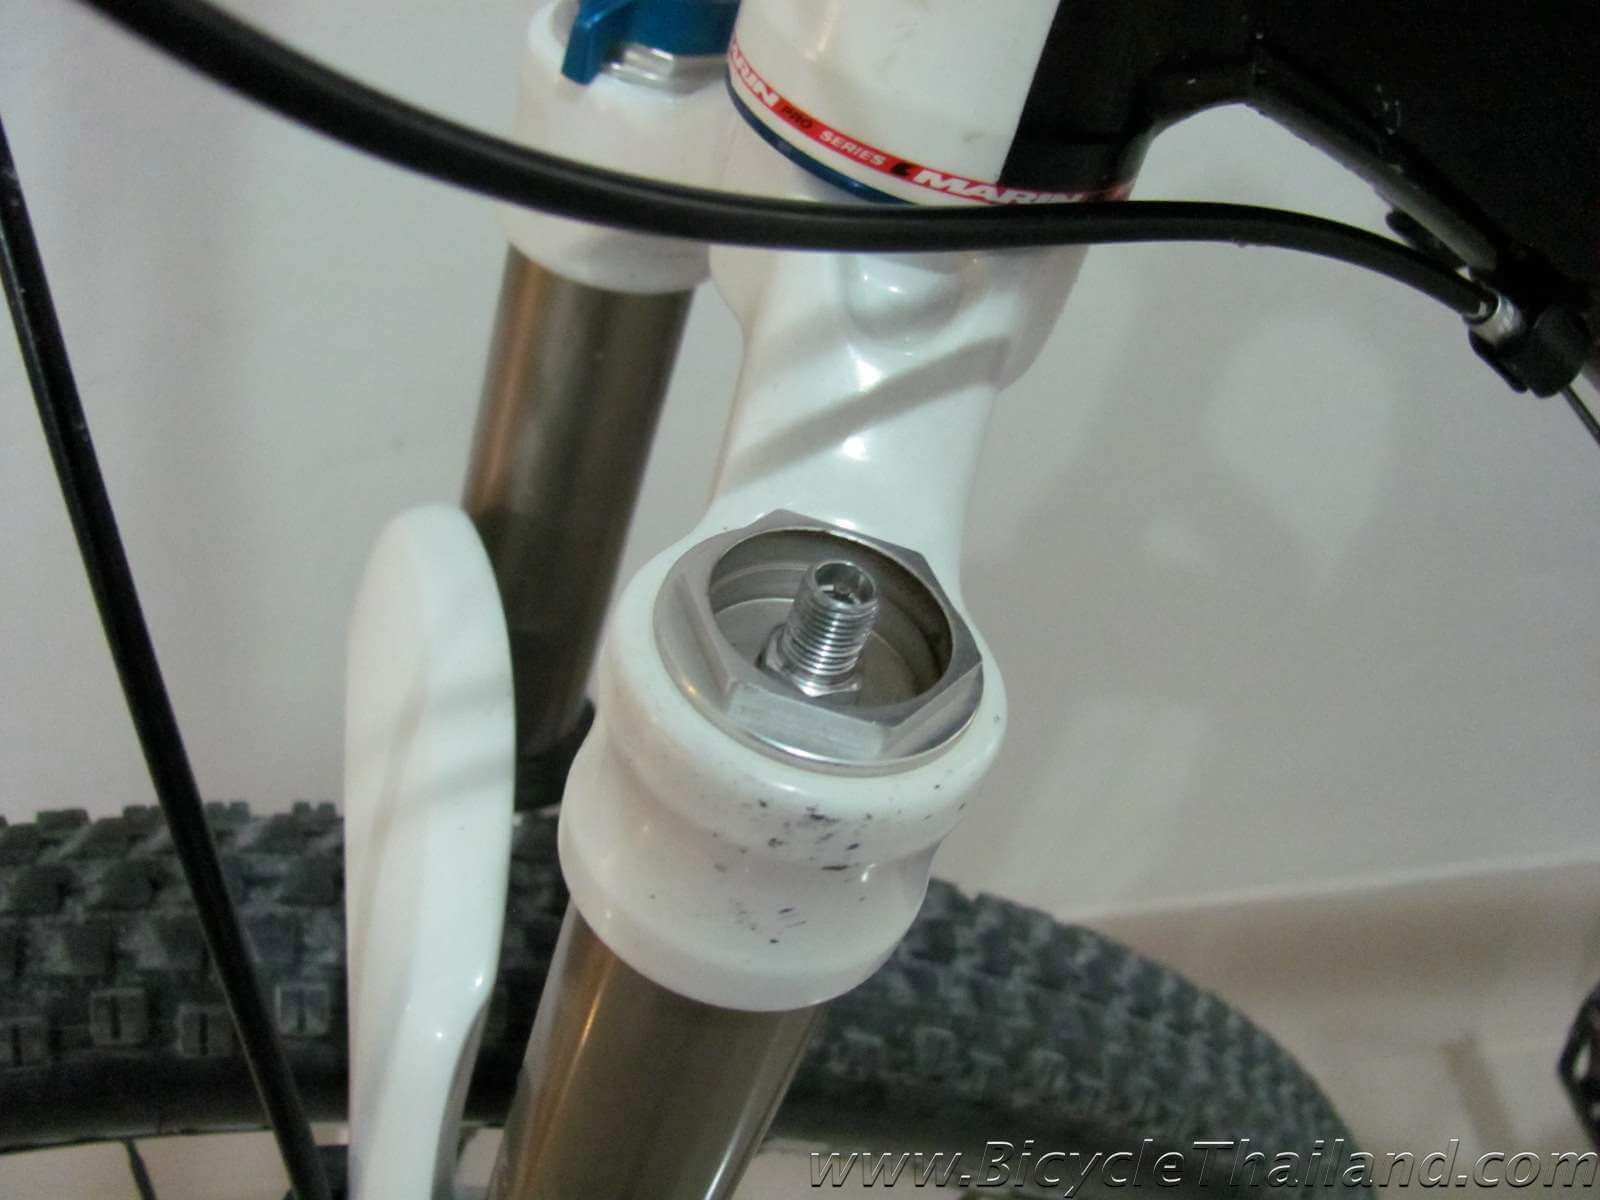
[caption id="attachment_11863" align="alignright" width="300"]http://bicyclethaila...tmk-300x201.jpg Pre-load adjustment knob. Heavier riders need more pre-load while lighter riders need less.[/caption]
What is pre-load? This coil sprung fork setting exists so that the fork can be customized to your weight (major reason) and riding style (minor reason). It's simply the initial compression of the internal spring in the fork. The more it's compressed, the stiffer the fork will feel. Bigger pre-load compresses the spring more, and so it's best for heavier riders and/or people who need/prefer a stiffer ride (racers etc.) Lighter riders should use less pre-load. Less pre-load will also give you a more plush ride, but the bike will dive more during braking.
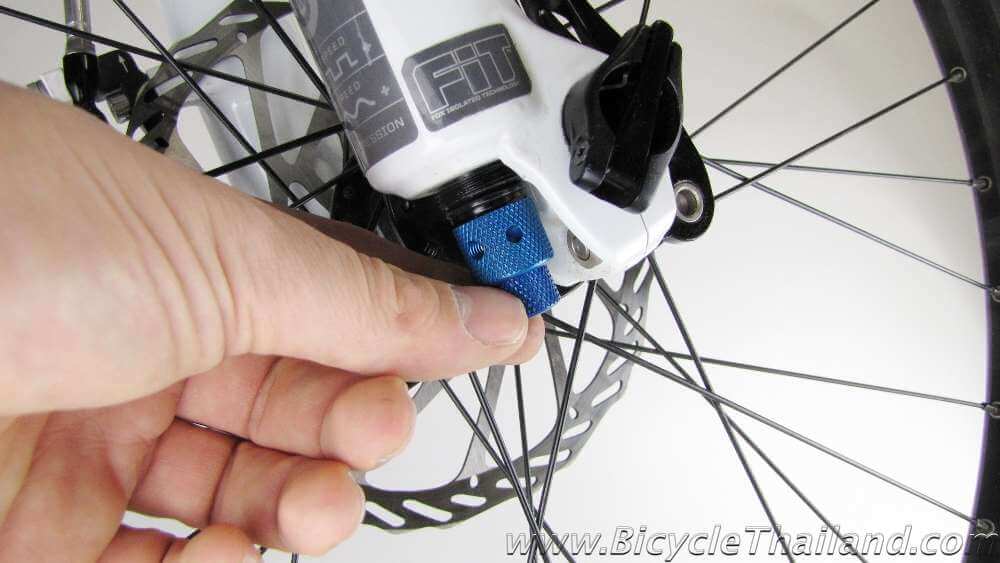
What is compression damping? Compression damping controls the speed at which the fork collapses or compresses as it encounters an obstacle. Too little compression damping (fork moves too fast) and the fork will go through all its travel on smaller sized bumps and bottom out. Too much compression damping and the fork will feel harsh and will not achieve full travel. Some forks offer this as an external adjustment while others are pre-set from the factory. Those forks without external adjusters can usually be adjusted internally if necessary. Additionally, many of the forks on the market intended for more aggressive riding will have two external compression adjustments: high and low speed.
[caption id="attachment_11864" align="alignleft" width="300"]http://bicyclethaila...tmk-300x168.jpg Compression damping knob is usually located at the bottom of the fork leg.[/caption]
- High-Speed Compression Damping
Controls the motion of the fork during high shaft velocities such as large impacts or sharp/sudden impacts. This adjustment can be used to reduce bottom out (higher/slower setting) or reduce spiking during sudden impacts (lower/faster setting). - Low-Speed Compression Damping
Controls the motion of the fork during low shaft velocities such braking and small bumps. This adjustment can be used to reduce brake dive and wallowy feel (higher/slower setting) or make the fork more sensitive to small bumps and track better in loose conditions (lower/faster setting)


