


[gallery link="file" columns="2"]
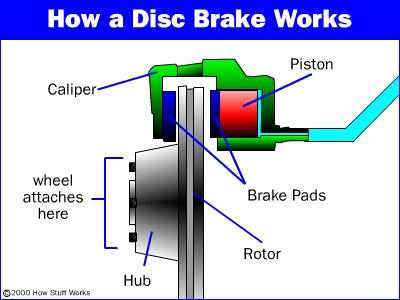
Proper function of a hydraulic disc brake depends on five factors:
- the rotor must be straight, smooth and clean,

- the caliper mechanism must be properly installed on the frame and aligned with the rotor,
- the disc brake pads must be installed and positioned correctly,
- the disc brake pads must have sufficient material remaining, and
- the hydraulic brake lines must be functioning properly; the lines should not have air bubbles, leaking bladders (at the lever reservoir), or loose connections at the lever mechanism and brake caliper.
STEPS FOR INSPECTING AND SERVICING YOUR DISC BRAKES
Check rotor, pad thickness, and caliper position.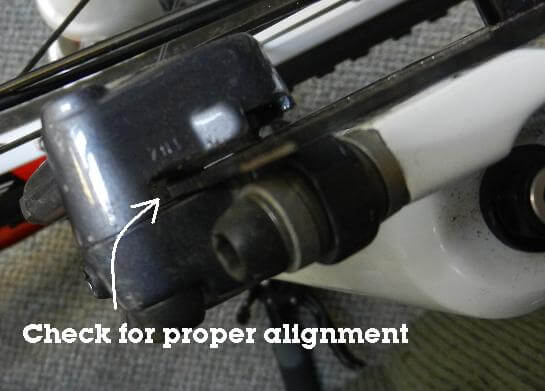 Spin the wheel and sight along the rotor disc to see how much brake pad you have left. See how much "daylight" you have between the rotor and pad, and note the thickness of each pad. Using a flashlight during this step may prove very useful. Hold a flashlight under the brake caliper while you sight the pad thickness from above. On most models of disc brakes this can easily be done with the wheel still in place. On Hayes brand, you'll need to remove the wheel and flip the bike over to get a better view. Check the disc rotor itself for warp and damage. Look for any side-to-side wobble. See if the caliper opening is centered on the rotor. In general, if there's something noticeably wrong with the rotor, you should replace it. That means if it's seriously worn, gouged, or bent, you're better off installing a new one rather than trying to straighten it.
Changing the brake pads.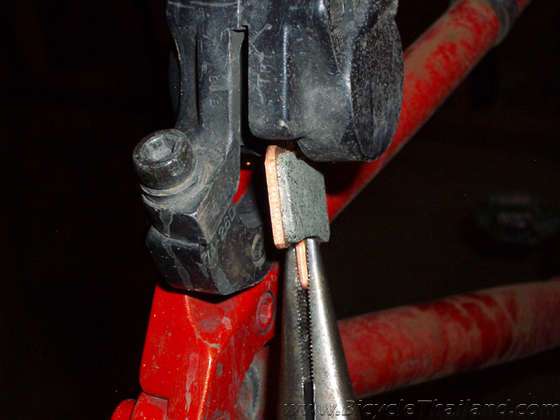 To change the disc brake pads, remove the wheel. Grasp the small handles of the brake pads and pinch them together. With your fingers move the brake pads towards the inside of the slot, away from their magnetic pistons. Once the brake pads are clear of the pistons you can remove them completely from the brake caliper by pulling them firmly out of the slot. On Avid and Hayes brand, there is an additional retaining clip that holds the pads in place. You need to overcome the tension of this clip before the pad will slide out. Clean the interior of the brake mechanism with a Q-tip soaked in isopropyl alcohol, removing all dirt, brake pad dust, and oil.
Insert each new brake pad. All brake pads are specific for inside versus outside (and top versus bottom). Pay special attention when removing old brake pads. Align and insert new brake pads in the same manner as old brake pads were removed. Push the new brake pads back into the caliper until you feel it click into place against the magnetic pistons on each side of the caliper. Make sure the pads are seated correctly. If a pad is inserted incorrectly, the gap for the disc rotor will not be correct and you'll most likely experience difficulty when reinserting the wheel.
Aligning the caliper mechanism.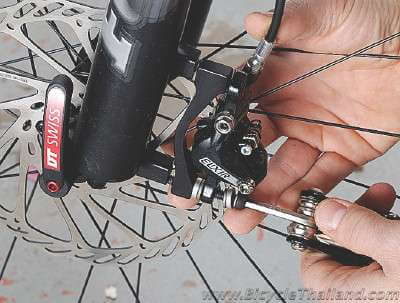 Loosen the two bolts that hold the main body of the brake caliper on the bicycle frame or fork. Don't take the bolts out; just back off the tension of the bolts enough to allow the caliper to be repositioned. Reinstall the wheel. If the brake caliper is off center, you can move it a bit in order to realign it on the rotor. Insert a piece of slim plastic along each side of the rotor. I find the plastic or cardboard container that the new brake pads came in to do the trick quite nicely. I've seen others use one or two playing cards. If you like a bit more brake lever motion before the brake actually engages, put a thicker buffer along the piston side of the caliper. The piston side of the caliper is the side that actually moves when the brake lever is pulled. Now grasp the brake lever tightly to push the pads tight against the rotor. Secure the brake lever with a zip-tie, toe-strap, or some other device to ensure it remains held tight. While the pads are tight, tighten down both brake caliper retaining bolts securely. Remove the device holding the brake lever. Remove the buffers you've placed between the pads and rotor. Now spin the wheel and ensure that the rotor spins freely and is clear of the pads. If necessary, adjust the brake caliper again, using the same method as before, altering the thickness of the buffers you use until you reach the desired effect.
Adjust brake lever reach.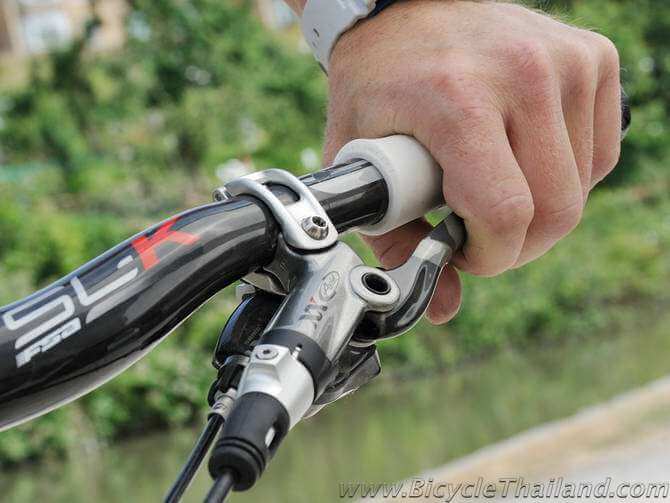 Some models of hydraulic disc brake levers have a small adjustment screw that allows you to set the 'reach' of the lever. If you prefer to have the brake lever closer to the handlebar, making it essentially easier to grasp for those with shorter fingers, you can adjust the set screw accordingly to suite your needs.


